

Connecting a monitor to an IMAC isn’t hard, but it can be a little confusing at first. Before you start, make sure you’re familiar with the different ports on your Mac and the ports on your monitor.
Then, you can connect your monitor to your IMAC using a Mini DisplayPort cable or Thunderbolt cable.
Table of Contents
Connect the Monitor:
Once you have the right cables or adapters and know which ports you need to connect your monitor, it should be pretty easy to get your monitor connected to your Mac.
Before you begin, though, make sure that the monitor is compatible with the Mac you plan to use it with and study the back or the display’s user guide for information on connection options.
If your monitor is an HDMI model, you’ll want to plug it into an HDMI port on your Mac. If it’s a VGA model, you’ll need to connect it via a VGA cable.
Once your monitor is connected, you can configure how it displays your screen. To do this, open System Preferences and click on Displays then Arrangement.
You’ll see an illustration of each display on the screen, along with a narrow, white bar that shows you which one is the primary display. Drag this bar to the display you want to be dominant.
Plug the Monitor into the IMAC:
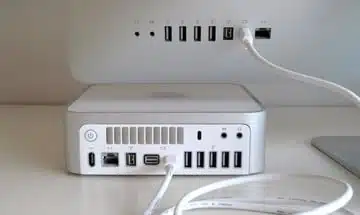
Using an external monitor for Mac OS X isn’t as difficult as you may think. Just be sure to pick a model that can handle the task and use the included USB hub or plug your display into an iMac’s USB port.
To make the process even easier, you can use a dock or stand that can be mounted to your desk or attached to the wall.
It’s also worth noting that you can use your desktop to power both your display and the computer itself, so it’s easy to get the most out of a single machine.
Lastly, the display itself is a bit pricier than your average laptop or desktop PC, so you’ll want to keep that in mind before dropping the cash.
Connect the IMAC to the Power Source:
The iMac is a high-end desktop computer with some impressive components. The first gen iMac was released in 2011 with a mind-boggling 24″ display and boasted the top of the line graphics processor (GPU) for the time. It also featured a Retina screen, a solid state drive (SSD), and a nifty LED backlit keyboard, among other features.
Despite the hefty price tag, a high-end iMac may be your best bet if you want a state of the art computer for your home or office. It also comes with an impressive suite of software applications. Nevertheless, there is still a lot of competition in the desktop computer arena.
If you’re after something a little more compact and less expensive, you’ll be happier with a MacBook Air or a PC laptop instead.
Configure the Monitor:
Monitors are an important part of computer systems. They display output in a way that is more readable and understandable to the user.
Depending on your needs, you may want to configure the monitor for extended desktop mode or mirroring. You can do that by opening System Preferences and clicking Displays.
After you’ve done that, macOS will automatically extend your desktop to the second screen. You can also change the primary display, which will determine which monitor gets notifications from macOS.
To change the primary display, click Arrangement at the top of the menu and drag the small white bar to the one you want to be the main.
You can drag it multiple times until you find the perfect arrangement for your setup. It’s easy to do. Once you’re happy, you can click Apply to make it permanent. If you need to change it back, simply repeat the process and drag the white bar to a different display.


Add comment