
If you’ve purchased an Apple Airtag, you may be wondering how to connect it to your iPhone. Here are a few tips to get started.
The first step is to enable location services and turn on Bluetooth. Next, you’ll need to establish two-factor authentication. Lastly, make sure you’re signed in to the same Apple ID as the Airtag.
Table of Contents
1. Turn on Bluetooth How to Connect Apple Airtag:
Also, ko Bluetooth is a wireless technology that allows devices to communicate with each other. It’s used to connect computers, tablets, and smartphones and can even be found in some smart home systems.
But while it’s handy to be able to pair two different devices in an instant, there are some security concerns.
Also, For example, it’s not hard for someone to intercept a Bluetooth connection (see Securing Wireless Networks) and use it for malicious purposes.
That’s why it’s always a good idea to turn Bluetooth off when you’re not using it. Not only does it keep unauthorized users from gaining access, but it also helps prevent Bluetooth connections from getting lost or disconnected.
To turn Bluetooth on, open Settings and tap Bluetooth. Once it’s turned on, you’ll see a list of devices you’ve previously connected to. Choose the device you want to connect to and tap Pair.
2. Turn on Wi-Fi:
Wi-Fi is a technology that lets you connect computers, tablets, and phones to a wireless network without having to plug them into an electrical outlet.
It’s a great way to share your internet connection with other devices, but it can also put your privacy at risk.
Also, If you have Wi-Fi in your home or business, you can connect your Apple Airtag to it to use its Find My app.
It’s safe to do so in most places, but it’s important to make sure that you’re connected to a reliable Wi-Fi network before attempting this.
To connect your Apple Airtag to a Wi-Fi network, go to Settings on your device and tap Wi-Fi. You may need to turn on the Ask to Join Networks toggle switch. If your device doesn’t automatically connect to Wi-Fi networks you’re in range of.
3. Turn on Cellular Data:
Also, One of the most important steps in connecting your Apple Airtag to an iPhone is turning on cellular data.
You can do this by opening the Settings app and tapping Cellular. This will turn on the cellular data button and enable the ability to connect your AirTags with your iPhone. Android phone, or Windows phone to your cellular network.
There are many ways to use cellular data on your Apple smartphone. And the best way to find out is by talking to a representative from your wireless carrier.
They should be able to answer your questions and help you find out if you need to switch carriers or upgrade your plan.
It’s also worth noting that you can get the most out of your cellular data by setting up two-factor authentication on your Apple ID.
This will require you to enter a security code that you’ll receive via text or phone call. It’s worth the effort to take advantage of this feature.
As it will prevent anyone from using your phone on a public wifi network or downloading apps that aren’t authorized.
4. Turn on Two-Factor Authentication:
Also, Two-Factor Authentication, or 2FA, is an extra layer of protection that helps ensure only you can access your Apple account.
It combines your password with a six-digit verification code that’s sent to a trusted device or phone number on file.
When you try to sign in on a new device or the web, you’ll receive a notification that someone is trying to sign in with your Apple ID.
This notification will show you the approximate location of the sign-in attempt, which is based on your iPhone or iPad’s IP address.
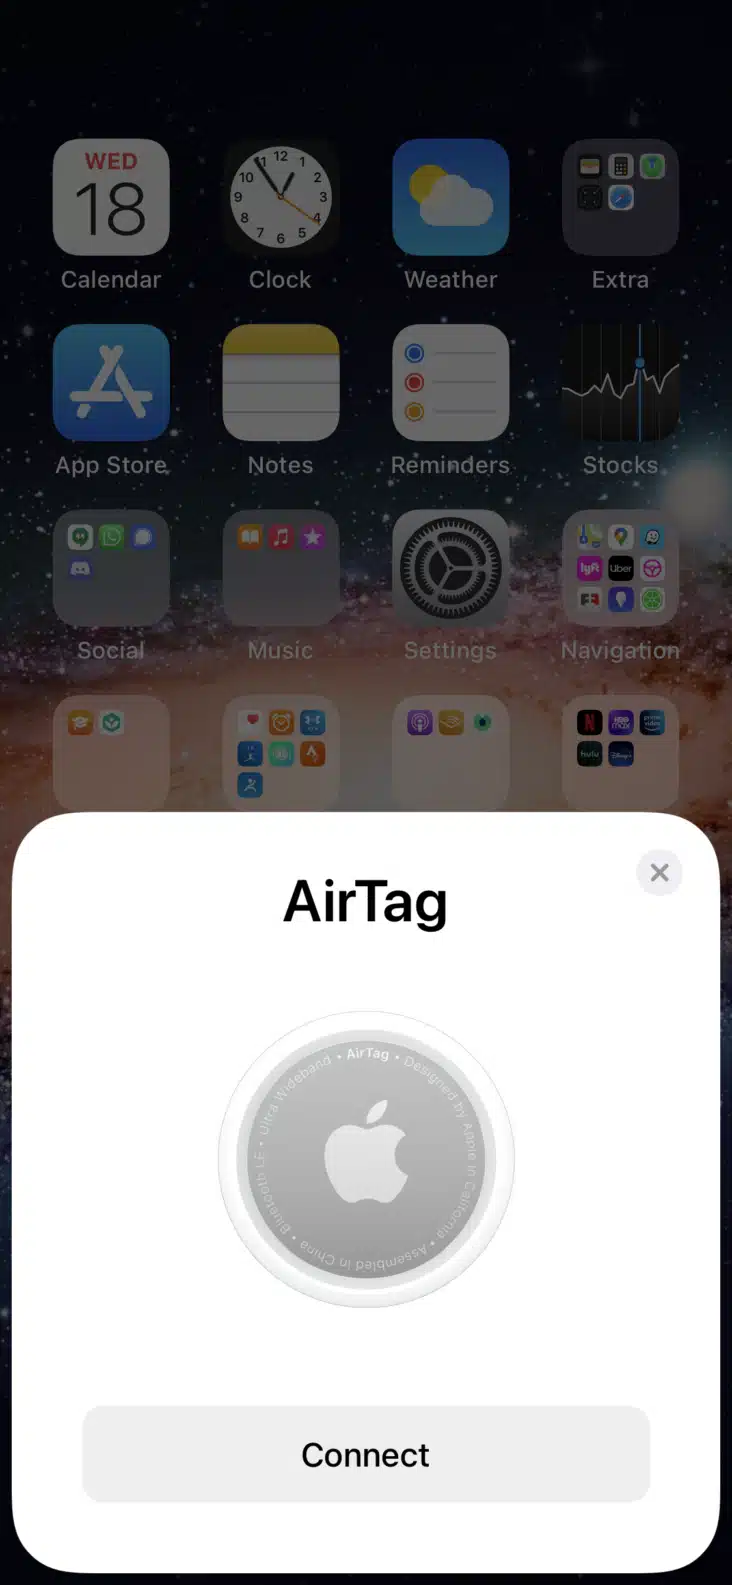
To connect your AirTag, remove the wrap from the packaging and pull out the tab (to activate the battery). Next, place it near your iPhone, iPad, or iPod touch. Once the device recognizes it, tap Connect.


Add comment