
Table of Contents
How To Connect Ethernet Cable To Wall Socket?
How To Connect Ethernet Cable To Wall Socket? A wired Ethernet connection offers a more stable and reliable Internet experience. A dedicated Ethernet cable also reduces interference from other electrical devices such as microwaves and cordless phones.
Wiring an ethernet wall socket is fairly simple, but it does require the right tools and skills. A basic DIY punch-down tool is inexpensive, and there are kits available that include everything you need.
Connecting the Cable:
A wired connection to the Internet is much faster and more secure than wireless networking. The technology behind it is well established and a lot of modern electronic gadgets have Ethernet ports on them including video game consoles, desktop and laptop computers, printers, modems, routers, and fax machines.
Ethernet cables are a little different from other cords because they need specific sockets that are designed to accommodate them. These sockets are called wall face plates and they have holes that accept RJ45 connectors (also known as keystone plugs). You can use a standard receptacle if you don’t have one of these face plates but it is not recommended.
It is better to have a dedicated connection rather than running your cables across the floor and through doorways for several reasons. It reduces interference and it is also more secure than wireless networks since data can’t be intercepted without the password or other security measures.
You can run ethernet cable to any location in the house where you want to have an Internet connection but it’s best to locate it close to your modem or router so you get the fastest possible speed. You should also try to avoid running the cable near electrical wires or water pipes. Also, if you do have to cross any electrical wires make sure to do so perpendicularly as opposed to parallel to each other.
Connecting the Wires:
Ethernet wall sockets are useful for connecting devices for broadband internet access in homes and businesses. These hard-wired connections are more reliable than Wi-Fi and don’t suffer from signal interference like wireless connections do.
Unlike standard outlets, Ethernet wall plugs have female receptacles that accept male cables. These types of wall outlets require specific tools to hook up. However, installing an Ethernet wall socket is relatively easy for anyone with intermediate experience.
The first step is to identify what kind of Ethernet cable you have. Most Ethernet cables are marked with codes that indicate their category. The most common categories are Cat-5 and Cat-6. However, there are also other options, such as a solid copper wire that preserves signals for longer distances than the more common copper-wrapped aluminum cables.
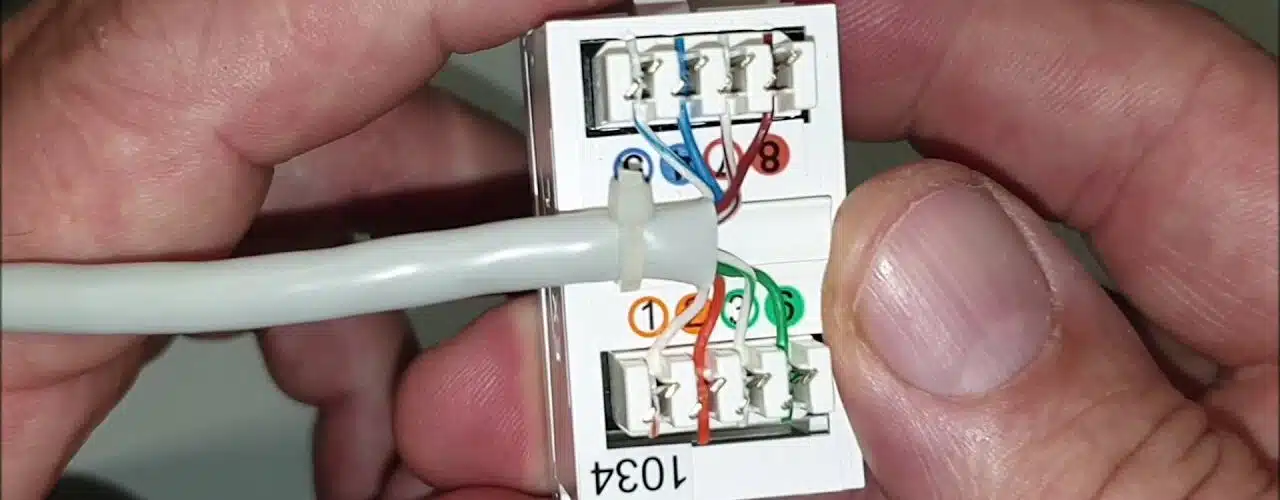
Once you know what kind of cable you have, the next step is to strip off the outer sheath. To do this, use the special tool that comes in RJ45 crimping kits. Depending on the type of Ethernet cable, there may be either two or three pairs of wires twisted together. The pairs are separated by a plastic X that you’ll need to cut through to expose the four wires.
Once you’ve stripped the cable, make sure all four pairs of wires are crossed over each other as shown in the diagrams above. It’s important that the wires are crossed correctly, otherwise, the ethernet wall socket won’t work. You can test this by using a cable tester.
Crimping the Wires:
Before you can connect your ethernet cable to the wall socket, you have to crimp the connectors on each end of the cable. You’ll need a punch-down tool for this, which is available at hardware stores for under PS30 / $30. If you have a lot of wires to terminate, consider purchasing one that also cuts the excess wire for you.
Start by stripping about 2 inches of insulation from each ethernet wire. Then, align the colored wires according to the layout of the jack’s pins. Make sure that the copper sheath extends past the end of the plug by about 5cm / 2 inches. Then, slip each wire into its corresponding terminal on the RJ45 connector. You may need to jiggle the connector slightly to get the wire in place. Then, firmly squeeze the crimping tool over the terminal until the terminal tabs are folded and securely crimped to the spark plug wire.
Make sure to use a crimping tool that’s specifically designed for RJ45 connections. Using a different type of crimping tool, such as a vice or needle-nose pliers, could create air pockets in the connector, which can result in moisture, corrosion, and other problems. Also, do not crimp the wires with a flat rock or hammer; this can cause them to break.
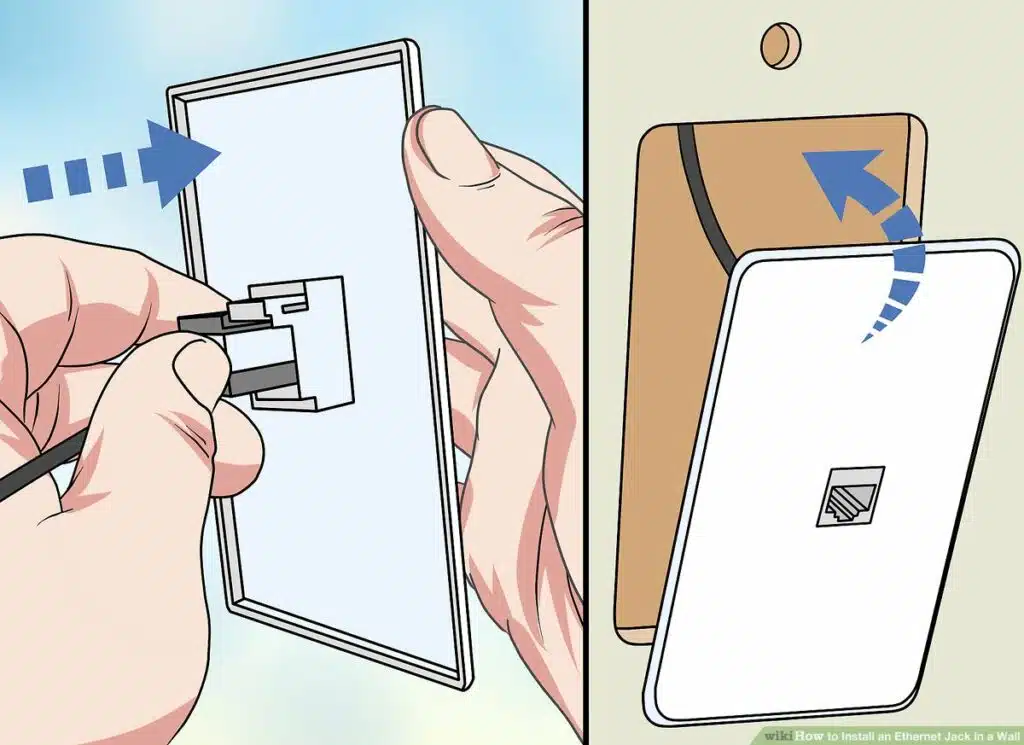
Connecting the Jack:
Ensure the jack is properly seated and aligned with the wall plate or socket. Screw the jack into place using the screws provided. Be careful not to overtighten the jack and damage it.
Once the jack is in place, you can begin running your Ethernet cable. During this step, it is important to evaluate the cable routing options and choose a route that will minimize cable visibility and protect the cable from damage. In addition, it is a good idea to consider the aesthetics of the installation area and select a location that will complement the surrounding decor.
Prior to cutting a hole in the wall, turn off any electrical power sources in the vicinity of the network jack. This will help to prevent the possibility of an electrical shock if you accidentally hit an existing wire while drilling. It is also a good idea to use a stud finder to locate any wall cavities and avoid drilling into any existing wiring.
To start, prepare the ethernet cable by stripping it to the proper length for your network jack. Generally, this will involve removing about half of the outer layer of insulation. Once the cable is prepared, it is a good idea to label the individual wires. It will make it much easier to identify which pair goes to each pin or terminal once the jack is installed in the wall.


Add comment