
Table of Contents
How To Connect Nintendo Switch To PC With HDMI?
How To Connect Nintendo Switch To PC With HDMI? If you’re looking to play your Nintendo Switch games on a bigger screen, there are several different ways that you can do it. One way is to use a capture card.
Another way is to use a portable monitor. These are great for gaming and are portable enough to take with you on the go.
Features Of Connect Nintendo Switch To PC With HDMI
- When you want to play your favorite games on a large screen, a good way of doing so is by connecting your Nintendo Switch to a computer monitor via an HDMI cable. This will enable you to experience your games on a bigger display, enhancing the visual quality of the graphics and giving you an immersive gaming experience.
- You’ll need a few essentials to get this set up, including the Nintendo Switch dock, an HDMI cable that supports the resolution and frame rate of your monitor, and a laptop with at least one HDMI port. To start, connect the AC adapter to your Switch and insert it into its dock, then take the HDMI cable and connect one end to the dock’s HDMI output port and the other to your monitor’s HDMI port. Once everything is connected, you should see the console’s interface appear on your monitor.
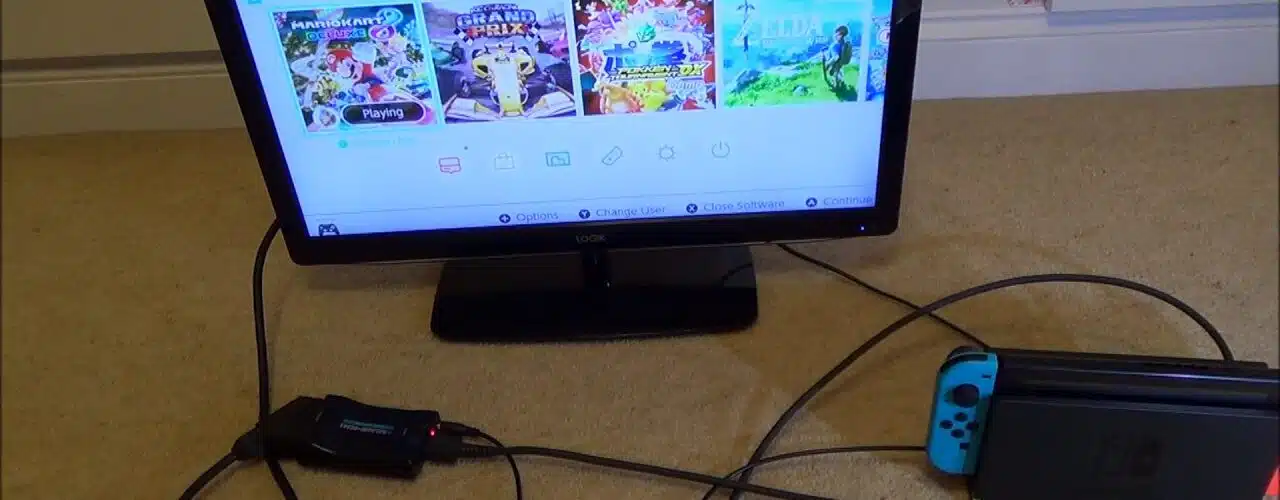
- This method requires a capture card, which will convert the HDMI signal from your console into a medium that your laptop will be able to detect. There are many different capture cards available, but Elgato’s Game Capture HD is a popular choice among gamers.
- The steps for establishing a connection between your Nintendo Switch and your laptop are similar, although you’ll need to install a video capture program before proceeding. Once you’ve installed the software, follow the on-screen instructions to set up the connection between your laptop and the switch. Once the connection is set up, you can use your laptop to record or live-stream your gameplay.
1. Using an HDMI Adapter
You can play your Nintendo Switch games on a monitor connected to your PC. To do so, you will need your Nintendo Switch console, its dock, an HDMI cable, and a monitor that has an HDMI port. This is a great way to enjoy your games on a larger screen, and it’s fairly easy.
The first step is to plug the AC adapter into the top terminal of the dock labeled “AC ADAPTER.” Next, connect the other end of the AC adapter to a power source. Once the console is powered on, connect one end of the HDMI cable to the HDMI port on the back of the dock, and the other end of the cable to your monitor. Ensure the cable isn’t too tight or trapped behind the monitor, as this could cause a video signal loss.
Once you have everything hooked up, open the video capture software on your computer. In this example, we are using PotPlayer and the free Elgato Game Capture HD software, but most other programs will work in the same way.
This software allows you to record or stream gameplay from your Nintendo Switch. Once you have recorded or streamed a game, you can view it on your PC or share it with friends. This is a great way to experience your favorite games in a new way, and it also allows you to take advantage of the many features of your computer.
2. Using a Monitor
If you want to take your gaming experience up a notch, consider connecting your Nintendo Switch to a monitor. This will allow you to enjoy immersive open-world adventures on a larger screen and get more out of the game. The process is simple and requires only a few supplies, including an HDMI cable and a monitor that supports the video output of your Nintendo Switch.

Using this method, you can record and share your gameplay with friends or stream it online. However, it’s important to note that the video quality will depend on your computer and monitor. It’s also best to use a high-quality HDMI cable to ensure that your signal is transmitted correctly.
To begin, turn off your Switch and connect it to a monitor via an HDMI cable. Plug one end of the cable into the HDMI-out port on the dock and the other into your computer’s monitor. Next, attach the USB end of the capture card to your laptop and install the software.
Once the setup is complete, you can play Nintendo Switch games on your laptop. This method works well for those who don’t want to purchase a separate monitor or want to use their existing one for recording and streaming gameplay. However, you should note that this method doesn’t work with all laptops. Most modern laptops only support HDMI input from external devices and don’t accept HDMI signals themselves.
3. Using a Laptop
You may be wondering whether it’s possible to connect your Nintendo Switch to a laptop and play games on the screen of that computer. Unfortunately, it is not a simple process. It requires a special capture card, which is a device that can take the HDMI output of the Switch and send it to a USB port on your laptop. It also needs a piece of software that can convert those signals into an image on your laptop’s screen.
The first step is to purchase a capture card and install its software on your laptop. You can find one on Amazon or elsewhere. This guide uses an Elgato HD60 HDMI capture card and free Elgato Game Capture software, but the steps should be the same for most other capture cards and programs.
Once you have everything set up, connect one end of the HDMI cable to your Switch dock and the other to your monitor. Then, turn on the monitor and power on your Switch. Finally, slide the Switch into the dock until you hear and feel it click. Your laptop’s monitor should now display your gaming experience. This is a great way to enjoy your favorite games on the go. Plus, you can save all your screenshots and videos to your PC. This is a great option for streamers or anyone who wants to capture their gaming adventures on video.
4. Using a Portable Monitor
The Nintendo Switch is a great portable gaming console, but it’s even better when connected to a PC monitor. It’s easier to navigate the on-screen menus and features when using a bigger screen, and you can play games with more immersion thanks to the increased resolution and image quality.
There are a few different ways to connect your Nintendo Switch to your laptop to make this possible. One option is to use an HDMI capture card, which can convert an HDMI signal into a format your laptop will recognize. Another option is to use a USB connection, which allows you to transfer your Switch’s media files to your computer.
You’ll need a few things to use this method: a Nintendo Switch and dock, an HDMI cable, and a PC monitor with an HDMI input port. Plug the HDMI cable into the output port on your Switch dock and the other end into the HDMI input port of your PC monitor. Set your monitor’s input source to the correct setting and turn on your Switch.
Once you’ve completed the setup process, open your laptop’s video game software. In this example, we’re using Elgato’s free Game Capture HD software, but you can use any similar program. You may also want to download BetterJoy, a piece of software that lets you use your Joy-Cons and Switch Pro controller as generic XInput devices on your PC.
Conclusion
There are several alternative methods available for connecting your Nintendo Switch to a TV or monitor, each of which offers different benefits and drawbacks. The method you choose should depend on the inputs available on your display device, as well as your personal preferences regarding video and audio quality. Before you begin, make sure to gather the necessary cables and accessories for the specific method you select. In addition, consult your TV or monitor’s user manual to ensure compatibility and to find out which input ports you should use.


Add comment