

Table of Contents
How To Switch To HDMI On PC Windows 10?
How To Switch To HDMI On PC Windows 10? The first step is to ensure that both the PC and the external display have HDMI ports. Most modern laptops and monitors come equipped with HDMI ports, but it’s always a good idea to double-check.
You’ll also need an HDMI switch and HDMI cables that support the resolutions and frame rates you need. Also, make sure your graphics drivers are up to date.
Connect the HDMI Cable:
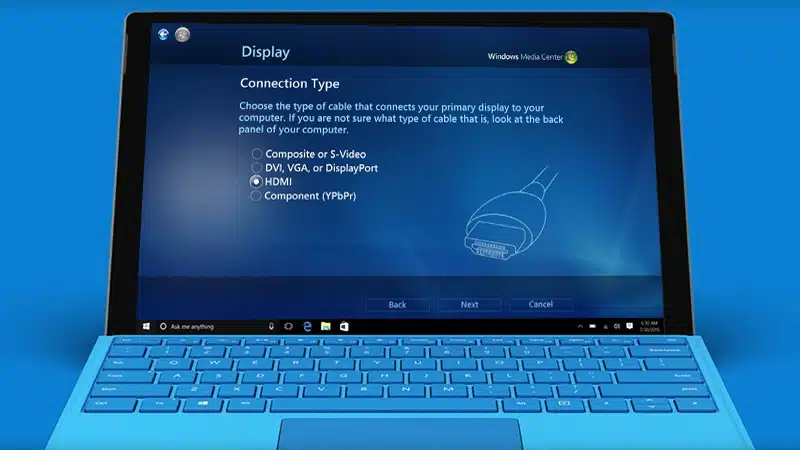
Before you can start using the HDMI port, you must ensure that it is connected properly to your computer. Look for the HDMI ports on your PC’s sides and back to do this. They should be small, rectangular ports with a protruding metal piece and labeled “HDMI.” You may also want to consult your PC’s user manual to see the exact location of these ports.
Once you’ve found the correct HDMI connection, plug one side of the cable into your device and the other into your Windows laptop. After this, restart your laptop to refresh the connection. This should fix any problems that are preventing the HDMI port from functioning properly.
Another way to solve this issue is to update or reinstall the graphics drivers on your computer. This is a relatively easy process that can be done through the Control Panel or the Settings app. If you are unsure how to do this, you can always consult the manufacturer’s customer support for assistance.
This method is easier and more effective than using the built-in display settings on your PC. However, it may not provide as many fine-tuning options for your GPU and drivers. In addition, it may not work consistently with all devices and operating systems. For this reason, we recommend using this method only as a last resort.
Set the Device as Default:
This method is easy and allows you to connect your PC to a television or other display device via HDMI. It also provides you with a variety of settings and modes for your display, including full HD, widescreen, and split-screen. However, the availability of these options may depend on the graphics hardware and drivers installed on your computer, as well as your familiarity with their control panel interface and options.
To activate HDMI output on your Windows 10 PC, first make sure that you have the proper cables and equipment. Then, plug one end of the cable into an HDMI port on your TV or other display device. You should then see a window of your desktop displayed on the screen. If you want to use a different display, click on the VOLUME icon in the taskbar and select PLAYBACK DEVICE. Then, choose the desired option and press SET DEFAULT.
Often, HDMI not working on laptops can be caused by outdated or incompatible graphics drivers. To fix this, you can download the latest drivers from the manufacturer’s website or use Windows Update.
If this doesn’t work, you can try restarting your laptop and trying a different display device. You can also check for software or programs that are causing a conflict with your HDMI connection.
Restart Your PC:
HDMI is a high-quality connection type that allows you to connect your laptop or PC to an external monitor, TV, or projector. This can be useful for presentations, streaming movies, or simply enjoying a larger screen. However, sometimes this connection method can be a bit frustrating when it stops working for no apparent reason. There are several methods that you can try to resolve this issue, including some proven fixes.
To start, make sure that the HDMI cable is connected properly to both your PC and external display. Also, make sure that both the display and the PC are powered on. You may also want to try using a different HDMI port or cable on your computer to see if that resolves the problem.
If you’re still having trouble, restart your PC. This can help reinstall or update the graphics drivers and may fix the HDMI port issue. You can also try running the Windows hardware and devices troubleshooter to identify and fix problems with your PC.
To run the troubleshooter, press Windows + I to open the Settings app. Then, select the “Update & Security” category. Finally, click the “Troubleshoot” option in the left pane and follow the on-screen instructions to run the troubleshooter. This will scan your computer for issues and provide a list of possible solutions.
Try Safe Mode:
Occasionally, a software program may disrupt the HDMI connection on your PC. To fix this, you can try to uninstall the program that caused the problem. To do this, open the Windows search panel on your PC and search for “Control Panel”. Click on the result and enter the “Programs and Features” window. Look for the recently installed program and right-click on it. Select the “Uninstall a program” option and follow the on-screen instructions to uninstall the program.
Another thing to try is to change the display settings on your computer to match those of the external device. To do this, press the Windows logo key and P simultaneously to bring up a panel of your computer’s display settings. Then, you can choose between three modes: PC screen only, extended, or duplicated. After you’ve made a choice, your content should appear on the screen that you’ve connected to via HDMI.
You can also try manually adjusting your display settings through the graphics control panel or the display driver settings. However, this method can provide limited options for fine-tuning the display settings and may not work consistently with all graphics hardware and driver. For this reason, it’s a good idea to use a third-party application that allows you to fix various issues with your graphics cards and monitors.


Add comment