
Table of Contents
How To Use USB-C To HDMI With Windows 10?
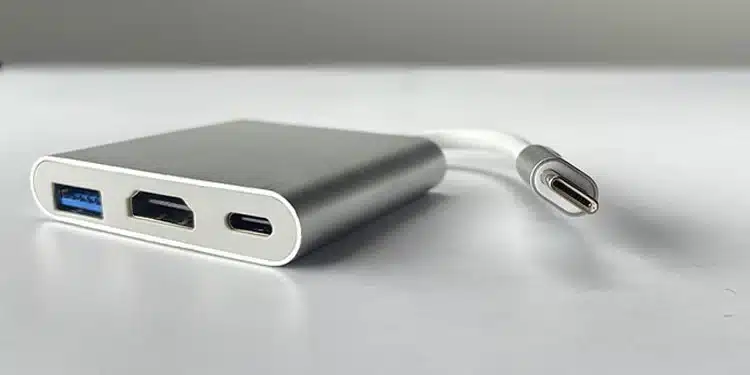
How To Use USB-C To HDMI Windows 10? The JCA365 USB-C to Dual HDMI Multi-Monitor Adapter lets you add an extra display to your MacBook or Windows laptop. Boost productivity with two displays and work from anywhere!
It may seem frustrating when your adapter stops working properly. However, the issue is often resolved with some simple troubleshooting steps.
1. Check the Connection:
A USB-C to HDMI adapter is a great way to connect your laptop or computer to an external display. It enables you to display high-definition content from your computer to an HDTV or monitor using a single cable. However, it can sometimes be difficult to get the connection working correctly.
This problem may occur due to several reasons, including a faulty adapter or USB port, outdated drivers, or an incompatible display driver. Fortunately, there are several troubleshooting tips that you can use to resolve the issue.
Start by ensuring that the adapter is connected properly to your computer and that the HDMI cable is fully plugged into the port on the back of the device. It is also a good idea to try another HDMI cable just to make sure that the problem is not with the cable itself.
You can also run a scan for hardware changes to help Windows recognize your USB-C to HDMI adapter. To do this, open the Device Manager and select your PC from the list at the top of the window. Then, click the Action tab and select Scan for hardware changes.
You can also try rolling back to a previous version of Windows if the scan for hardware changes fails to fix the problem. To do this, press the Win + I key to open Settings and then click Update & security. Then, click the Recovery option and follow the on-screen instructions to roll back to a previous build of Windows.
2. Check the Cable:
The USB-C connector can carry many kinds of signals and supports both video and data. However, not all monitors support these inputs via USB-C. It is best to check your laptop’s documentation or the manufacturer’s website to see if your model supports a USB-C to HDMI adapter.
Make sure the cable that connects your USB-C port to your external display or TV is not damaged or disconnected. Also, ensure that the USB-C end of the adapter is securely plugged into the Surface’s USB-C port. Finally, ensure that the HDMI end of the cable is properly connected to your monitor.
If the problem persists, try a different cable between your USB-C port and the HDMI output. This will help rule out a faulty cable or connection as the source of the problem.
In some cases, the driver for your USB-C to HDMI adapter may not be updated. This can cause the device to stop working properly. To fix this issue, you can download and install the latest driver for your device from the manufacturer’s website or use a driver update tool like Driver Easy.
If the problem continues to occur, you can restore your system to a point in time before the problem starts to resolve the issue. To do this, follow these steps:
3. Check the Settings:
The HDMI port on a laptop is a great way to connect your computer to a monitor, TV, or projector. However, not all laptops have an HDMI port, and even if they do, many users need to use a USB-C to HDMI adapter to get their laptop’s screen to display on their external monitor. Fortunately, there are a few ways to fix this problem.
Firstly, check that your laptop has an HDMI port and a working power supply. If it does, make sure that the USB-C end of the adapter is plugged into the HDMI port and the other end is connected to the laptop. Next, check that your adapter supports DP Alt Mode. If it does, it should automatically detect the HDMI device and configure the display settings for it. If it doesn’t, you may need to manually change the HDMI input source on your laptop or use a specialized driver update tool.
Most of the time, USB-C to HDMI connections work well, but some issues can arise – mainly because of hardware problems, such as a faulty adapter or USB port. The most common solution is to try some simple troubleshooting steps, mostly related to the drivers for the adapter or USB link itself. If that doesn’t help, you can always contact the manufacturer or check for updates through the Windows Store.
4. Restart:
USB to HDMI adapters enable users to connect their laptops or computers with an HDMI-enabled monitor. However, they don’t always work for some Windows 10 users. The problem may be a simple software or hardware issue. This article from MiniTool Partition Wizard outlines 4 fixes that can help resolve the issue.
One of the simplest solutions is to restart your computer. This should reset the adapter and restore its functionality. Another solution is to use a different adapter. This will help you determine whether the problem is with your adapter or with your computer.
You can also try updating your driver for the USB to HDMI adapter. You can do this by visiting the website of your adapter manufacturer and downloading the latest version.
If all of these troubleshooting steps fail, the USB to HDMI adapter might be faulty. If this is the case, you can contact the manufacturer for a replacement or refund. It’s also possible that the issue is a result of a recent Windows update. If so, you can roll back the operating system to a previous version. To do this, press the Win + I keys to open Settings and click Update & Security. Next, select Recovery and follow the on-screen instructions to roll back the platform.


Add comment