
Table of Contents
How To Connect Jio Fiber To TP-Link Router?
How To Connect Jio Fiber To TP-Link Router? If you want to increase the wireless range of your Jio Fiber home router, then you should consider using a range extender. This will provide more coverage in areas where there are low WiFi signals.
This TP-Link router has decent internet speed and works as a range extender. It has a good design and is affordable.
How to Connect?
Jio Fiber is a good internet service but the router that comes with it is not very good. It has a very limited WiFi range and it doesn’t have many features. If you want to increase the range of your Jio Fiber WiFi then you should consider buying a range extender or a different router. Here are some of the best options available:
The D-link Wi-Fi range extender is a great choice for Jio Fiber. It can extend the wireless coverage of your home up to 10000 sq ft and provides a decent internet speed of 1 Gbps over the 5 GHz band and 300 Mbps on the 2.4 GHz band. You can also connect wired devices to this range extender by using a LAN cable.
Another option is the Tp-link RE305 router. This is a budget-friendly router that is perfect for the basic internet plans of Jio Fiber. It can provide a decent internet speed of up to 300 Mbps and has four high-gain antennas. It also has a nice design and is easy to set up.
Finally, if you are looking for a high-performance router then check out the ASUS RT-AC68U. This is a premium router that has many features and can be used with Jio Fiber. It can handle up to 500 Mbps internet speed on the 5 GHz band and has excellent range. It also has a built-in VPN server and can be used to connect multiple computers to the same WiFi network.
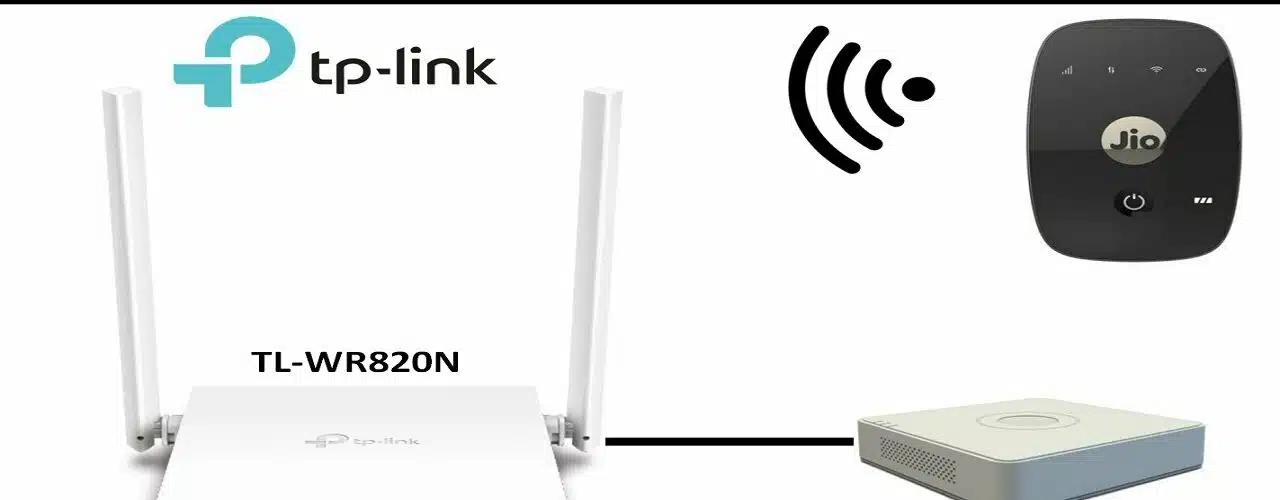
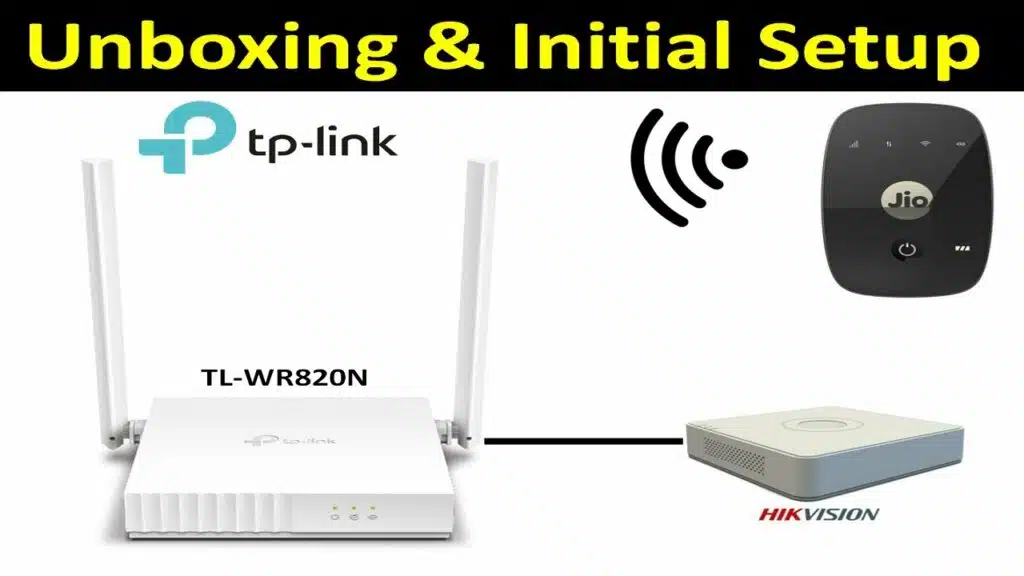
Step 1 – Connect the TP-Link Router:
If you have a Jio Fiber internet connection and need to increase its range then consider using a router or Wifi range extender. These devices can be connected to the Jio Fiber network through a LAN cable and provide an additional wireless signal. You can also use them to improve the internet speed of your Jio Fiber connection.
One of the best options is a TP-link RE305 Wi-Fi range extender. This device is affordable and provides a decent range of wireless coverage. It is capable of supporting a maximum of 300 Mbps of internet speed on the 2.4 GHz band. It also has four high-gain antennas to provide a better signal strength.
Another good option is the Dlink R15, which is a Wi-Fi 6 router that can provide a decent internet speed and a good range of WiFi coverage. This router is capable of supporting up to 1200 Mbps on the 5 GHz band and 300 Mbps on the 2.4 GHz band. It is also compatible with Jio Fiber and comes with features like EaglePro AI and Parental controls.
Step 2 – Connect the Modem:
The router which is given with Jio Fiber has a very low WiFi range. To increase its range, you can connect it to a WiFi repeater. A wireless repeater is a device that takes radio signals from your primary wireless connection and retransmits them, increasing the range. It can be used with any router that has DD-WRT installed.
First, turn off your cable modem and TP-Link router. Then, plug one end of the ethernet cable into the WAN port on the TP-Link router and the other end into your computer system. You can also use a Wi-Fi connection, but it will be slower than an ethernet connection.
Once the TP-Link router is connected to your computer, open a web browser and log into the TP-Link interface. You’ll see a screen with different options, including time zone, internet connection type, and network settings. Click the Quick Setup button and follow the prompts.
Select Dynamic IP as your Internet Connection Type and save your changes. Then, wait for a few minutes. You should be able to see a green light on the TP-Link router’s WAN port, which indicates that it has successfully synchronized with your modem. You can also check the status of the connection in the router’s web-based interface. The status will change to Connected once the synchronization process is complete.
Step 3 – Configure the TP-Link Router:
A router is a device that connects multiple devices, such as computers and smartphones, to a network. It also provides Wi-Fi connectivity, which allows you to use the Internet from anywhere in your home. Setting up a TP-Link router is easy and can be done using the web interface on your computer. You can also access your router’s configuration page from a smartphone or tablet. This wikiHow article will teach you how to configure a TP-Link router via its web UI.
First, you need to make sure that the router is configured as an access point. To do this, connect an ethernet cable to one of the available “LAN” ports on the router and then connect it to your PC. After that, connect a second ethernet cable to the modem and then to another LAN port on the router. Next, you should change the WAN connection type to PPPoE. Once you’ve done that, click Save and wait for the router to connect to the Internet.
You can also change the MAC address of the router’s WAN port by entering a new MAC address or by clicking Clone MAC Address and cloning the MAC address of your PC. You can also set up a wireless password to prevent unauthorized access to your router’s web interface. To do this, enter the administrator password that you created when you first logged in to the router’s web interface and then click Log In.


Add comment