

Table of Contents
How to Connect MacBook Air to the Printer With a USB Connection:
First, you need to add your printer to your computer. This will be done through the Print Settings app on your Mac.
Once you’ve added it, you’ll have to install a configuration profile and enter its IP address. After you’ve done this, you should be able to print from your MacBook Air. This can take a couple of minutes, but once you have it set up, you can begin printing.
How to connect a printer to a printer with a USB:
When you need to How connect a MacBook air to the printer with a USB, you have a few options. You can use Wi-Fi to connect to nearby printers or choose a USB connection. In both cases, you’ll need to make sure that the printer is turned on, online, and on the correct network.
If your printer is not able to connect through Wi-Fi, you’ll need to download the latest driver for your printer from the manufacturer’s website and install it manually.
First, you need to find the IP address of the printer that you want to use. Then, in the printer’s menu, you have to select the IP address of the printer.
Alternatively, you can choose to use a different print driver in the printer’s menu. After you’ve done this, you’re ready to add a printer to your Mac.
If your printer doesn’t have a USB port, you can daisy-chain adapters, but this can be risky. You’ll need a USB-C to USB adapter or an Apple Thunderbolt to FireWire adapter. Make sure the adapter supports USB 3.1 before you connect any printers to your computer.
To connect your printer to your MacBook Air, you first need to add it to the Printers list. Once you have added it, the printer will be ready to connect to your MacBook Air.
Next, you’ll need to plug the USB cable into your MacBook Air’s USB port. You can also open System Preferences and select the Print and Fax option. After this, you’ll need to add a printer driver for your printer.
Installing a configuration profile for a printer:
Installing a configuration profile for a Mac printer is an easy process, but you may need to install extra software. There are several ways to do this. The first method requires installing additional software, such as lpadmin.
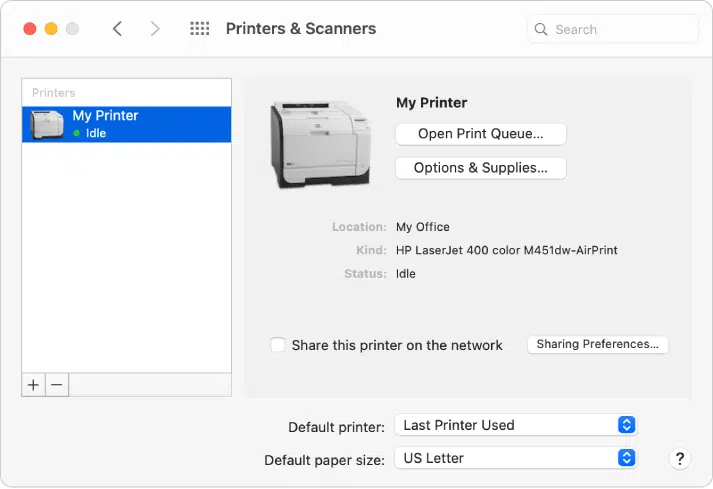
To install this software on your Mac, open System Preferences and select “Printers and Scanners.” You should then double-click on the printer profile you wish to install. After this, you will see a confirmation pop-up window that will allow you to finish installing the profile.
Once you have successfully installed the printer drivers, you can now install the configuration profile for the printer. You can also deploy it via MDM by configuring the print driver.
You can use this option to install the printer drivers on your Mac. However, if you don’t install the drivers, you can’t use your printer on your Mac.
You can also install printers via the Apple Self-Service app. Once the printer is added to your Mac, you can then add it as an IP printer.
Make sure to connect your printer to a network before adding it as a device. Once you’ve done this, the printer will be added to your printer list automatically.
Once you’ve finished installing the profile, you can connect your printer to your Mac using a USB connection if it doesn’t support AirPrint.
Next, connect the printer via a Wi-Fi connection, if it has one. If so, select the “Wireless Setup Wizard” option. If you are using a Wi-Fi connection, you will need to select a printer driver that supports this network connection.
Finding a printer’s IP address:
When you want to find the IP address of a printer on your MacBook air, there are several methods you can try. You can look up the IP address using the Control Panel and find it in the “Devices and Printers” section.
The IP address of the printer is found in three or five tabs depending on your connection type. After you find the IP address, you need to ping the printer.
The first step is to open System Preferences on your MacBook air. You can do this by clicking the Apple icon on the dock and selecting the “System Preferences” option.
Next, open the “Utilities” folder in the Applications folder and type “cupsctl web interface” to enable the CUPS web interface. You can also go directly to the printer’s location by opening Safari and typing localhost:631/printers.
You can also check the manual of your printer to get the IP address. Most printers have an advanced settings menu that can help you find the IP address.
If the manual of your printer does not contain instructions, click the Home button to open the printer menu. Afterward, you can go to the Network settings tab and click on ‘View wireless details’ to see the printer’s IP address.
You can also find the printer’s IP address on the menu screen. The printer’s IP address is listed in the menu, along with its wifi and network status. Make a note of the IP address and click “Back” to return to the menu.


Add comment