
Table of Contents
How to Connect Printer to Computer With USB:
Once you’ve purchased a printer, you’ll need to know how to connect it to your computer with a USB.
This can be done on a Windows PC, a Mac, or even a Chromebook. Once you’ve plugged in the USB cable, you’ll need to install the printer driver.
Installing a How to Connect Printer to Computer with USB:
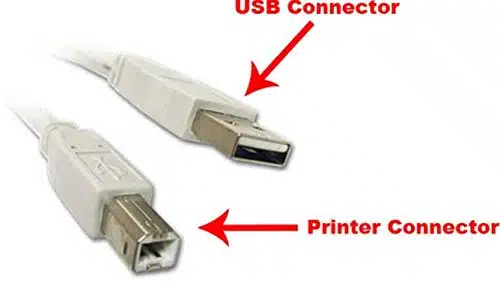
If you are installing a new printer, you can connect it using a USB cable. First, turn off the printer, then plug in the USB cable from the printer to your computer.
Next, install a USB strain relief clip that secures the USB cable to the printer. Screw this in place with the provided screw.
Once you have the USB cable, turn on your printer and follow the on-screen instructions to install the software.
The software installation process will vary depending on the manufacturer and model of your printer. If your printer comes with a software CD, you may need to install it first. If not, you may need to download the software for your printer online.
Configuring a printer for a USB connection:
Before connecting a printer to a computer via USB, you must install its driver. Windows is compatible with the USB driver format.
After installation, you can configure the printer through the front panel menu. The installation process is relatively easy – follow the instructions provided on the installation disk.
If your printer does not have its own network, you must connect it to the router. You can do this by connecting it to your computer through a wired or wireless connection. In addition, you must update the firmware on your printer.
Checking a printer’s USB cable:
If you’re having trouble printing documents from your printer, you might want to consider checking the USB cable for damage.
If you notice any physical damage to the cable, or if there are any crimps or faulty connections, it’s time to replace it. USB cables should be about six feet long, and you should replace them only if they’re damaged.
First, make sure the USB port on your computer and printer are free of dust or debris. You may need to use a compressed air duster to clean them.
Also, be sure that the USB connector on your printer is clean and not catching on anything. If you’re concerned about the length of your USB cable, consider replacing it with a shorter cable.
Installing a printer driver on Windows 10:
If your printer is not functioning properly, there are several ways to install a new driver on Windows 10. First, you need to locate the driver software on your computer. This can be done by going to Control Panel > Devices and Printers.
There, you will find information about your printer model and its driver. Once you have the driver software, you can install it by following the instructions or by using the Driver Updater tool.
If you’re experiencing problems installing your new printer driver, you can contact a tech expert. You can also follow Windows 10’s guidance for installing the driver. Choose the option that’s best for you.
Adding a local printer to Windows 10:
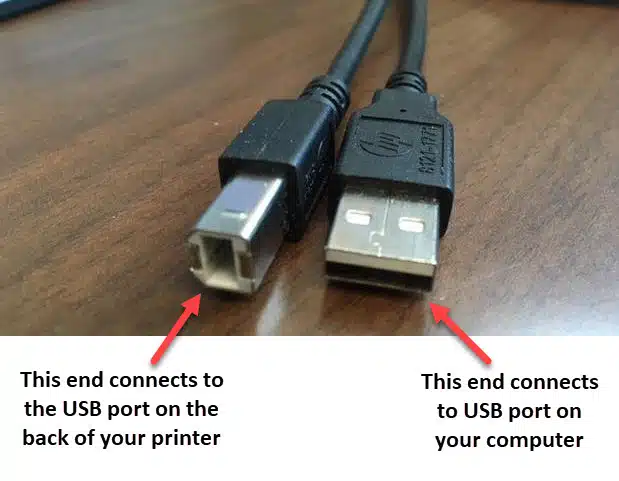
The first step in adding a local printer to Windows 10 is to connect the printer to your PC via USB. This step is crucial in allowing Windows to detect the printer.
Ensure that the USB cable is securely connected to both the computer and printer. If it is connected to a docking station or hub, this could interfere with the solid connection.
Once the connection is established, select the Add a local printer or network printer option, or choose to Use an existing port.
The next step is to download the printer driver. You can find this on the manufacturer’s website or on the printer’s box.
Once you’ve located the driver, you can either save it to a folder on your computer or copy it to your USB media drive.
Once the driver is downloaded, connect the printer to the computer using the USB cable and turn it on using the power button.
Installing a shared printer on Windows 10:
To install a shared printer on Windows 10, you must first install the printer driver on the computer that is to serve as the primary user.
The primary computer must also be connected to the same network and router. To start the process, press the Windows key + I to open the Settings menu.
Then, select the Printers & scanners option. On the Printers tab, click the Share this printer option. If you don’t see the option, click Change sharing options.
Once you have installed the driver on the client computer, you can access the shared printer on the host computer. Right-click on the printer to bring up its properties. This will display the default system name and you can change this to better identify the printer.
If the OS of the shared printer is different from yours, you may need to install additional drivers for it. You can find the necessary drivers in the Additional Drivers section. Note that the shared printer is only available when the host computer is turned on.


Add comment