

A VPN, or virtual private network, can provide a more secure connection when using your laptop. Whether you need to connect to the internet when working from a coffee shop or want to access your company’s resources, a VPN can help.
To connect to a VPN, first select Settings > Network & Internet. Then, click Add a VPN connection.
Table of Contents
1. Download a How to Connect VPN to Laptop:
A VPN (virtual private network) is a tool that can help protect your privacy and security online. They encrypt data transfers, which makes it harder for hackers to steal information.
A good VPN will also help you bypass content restrictions and protect your IP address. However, it’s important to know how much data they can use and store.
The best VPNs should offer apps for multiple operating systems, including Windows, macOS, iOS, and Android. Many will also support routers, too.
2. Install the VPN:
If your computer has Windows, it’s very simple to set up a VPN connection using the built-in client. There are a few steps you need to take, but once it’s all done, your PC will be ready for VPN use.
The first step in setting up a VPN is to create a profile. This can be done with a VPN service app, or manually.
Once you’ve created a VPN profile, the next step is to add the VPN server and connect it to your computer. To do this, click on the Network icon on the taskbar.
You’ll need to provide the VPN server’s name and address. It can be a public IP address or a dynamic DNS address.
In addition to this, you’ll need to specify the type of VPN you want to use and how you’d like to sign in (e.g., username and password or certificate). You can also add shortcuts to apps or websites you regularly access while connected to a VPN.
3. Connect to the VPN:
Once you’ve downloaded a VPN and installed it on your device, the next step is to configure it. This means setting up the VPN to work properly on your computer and making sure it’s configured to use all of its features.
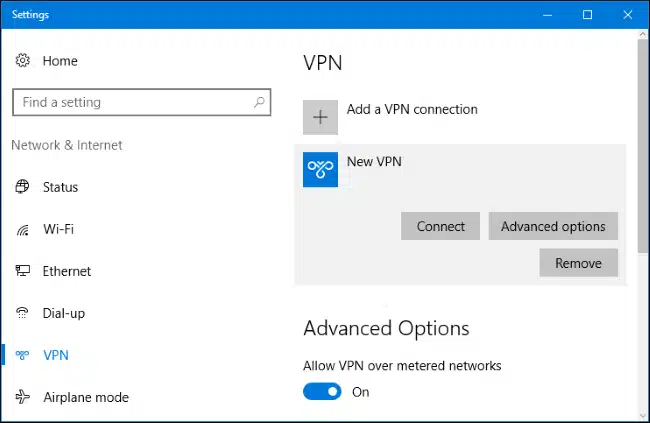
First, head into the Network and Internet settings on your laptop. You’ll see the VPN you just added under the VPN connections section.
You’ll also see the option to connect to it. Click that and choose “Connect.”
In the VPN Connection window, enter your server information, as well as your sign-in details. This could include a username and password or server address.
You can then select to use L2TP, IPSec, or MSCHAPv2. Each offers different levels of protection. If you’re looking for the most security, you should probably go with IPSec or L2TP.
However, if you’re just looking to protect your privacy and want to be able to access websites without being tracked by your provider, then MSCHAPv2 is the way to go.
4. Disconnect from the VPN:
A VPN keeps you safe when you’re online, allowing you to bypass censorship and geo-blocks. It also protects your privacy by encrypting your data and hiding your identity from prying eyes.
But sometimes, a VPN can act up and refuse to connect. This happens when the VPN is experiencing a problem, such as a bug or security flaw that affects its performance.
If your VPN is refusing to connect, try reconnecting it again. This will re-configure it and ensure that it is configured properly for your device.
The most common reason why a VPN can refuse to connect is that it is experiencing a problem. It could be a server issue, such as a maintenance window or network congestion that makes it unavailable.
In other cases, it could be a conflict with your firewall or antivirus software. This is usually fixed by adding your VPN software to the list of exceptions in your firewall.


Add comment