
Table of Contents
How to Connect a Wireless Mouse to Your Mac:
To connect a wireless mouse to your Mac, you need to turn on the mouse and click the Connect button on its device.
Next, your Mac needs to discover the wireless mouse. To do this, you need to click the Connect button next to the mouse name. Once paired, the mouse should display “Connected” in the status bar.
Install drivers How to connect Wireless Mouse:
You may want to update the drivers of your wireless mouse if you are experiencing problems. You can do this by running a DriverGuide on your computer.
This tool can help you identify the correct driver for your operating system and download it. However, you should have at least intermediate computer skills to perform this process. You can also use a Mouse Driver Update Utility to update your mouse drivers automatically.
The driver is the software that enables your device to communicate with your computer. If the drivers are out-of-date, or if they have been deleted, this can affect your computer’s ability to recognize the device. Getting the latest driver can solve any problems with your device.
You can also use an advanced driver updater, which shows you compatible updates, backups up your old drivers before updating them, and comes backed by an experienced technical support team.
Check if the mouse is in pairing mode:
If you’re having trouble pairing your wireless mouse, you need to check that it is in pairing mode. Turn on the mouse and look at the Bluetooth connection button on the top or bottom. If you don’t see it, contact the manufacturer of your wireless mouse for assistance.
After pairing, you’ll see your mouse’s name in the Bluetooth window. If that doesn’t work, try another USB port or a different computer.
Make sure the battery on your wireless mouse is charged. Also, remove any plastic covering the batteries. If the cursor still won’t move, try restarting your computer or updating the operating system.
Check if the mouse is working:
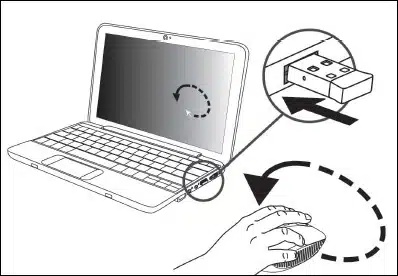
To check if the wireless mouse is working, you can look at the power switch on the bottom of the device. In some cases, the device comes with a dongle that plugs into a USB port on the computer. Sometimes, the dongle is stored inside the battery bay. In either case, make sure that you have plugged it into the computer.
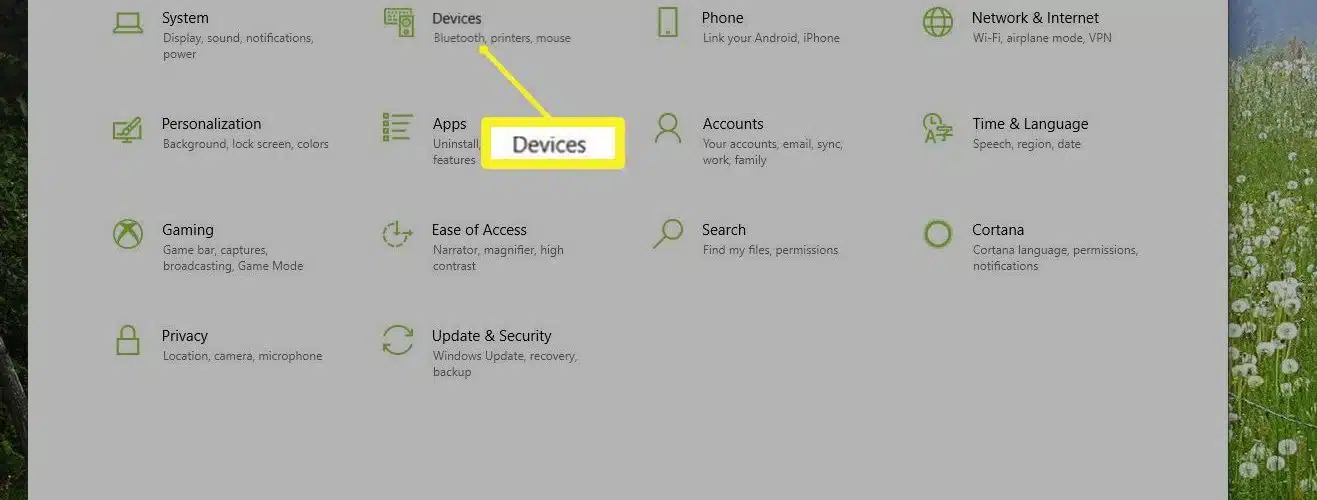
If the mouse is still not working, you can try to download the driver again. You can do this by opening Control Panel and going to Hardware and Devices.
Often, this is due to outdated drivers. You can update the drivers of your mouse from its manufacturer’s website.
There are two ways to update the mouse drivers: one is by using the mouse’s software, and the other way is by visiting the manufacturer’s website.
Restart the computer:
If your Wireless Mouse stops working, you may need to reinstall its driver. To do this, you must restart your computer and then select the correct driver.
After you have done this, you should be able to use your Wireless Mouse again. If this does not work, you may need to replace the battery.
Sometimes the problem could be as simple as the mouse not moving. It could also be that it keeps losing connection and moving haphazardly across the screen. Fortunately, there are a few ways to troubleshoot these issues yourself.
The easiest method involves powering off and restarting the computer. To do this, you should press the reset button for a few seconds. Some reset buttons are hidden, so you need to be careful and press them carefully.
Another solution is to remove the battery and reconnect it. Another way to fix a wireless mouse is to change the USB port. Sometimes, the USB port goes bad and the mouse will not work.
If you are unable to replace the battery, try disconnecting the mouse and reconnecting it to a different computer. You can also try uninstalling Unifying software, which can reset the system.


Add comment