
The Xbox Wireless Controller is the primary controller for Microsoft’s Xbox Series X/S and home video game consoles.
It features a new layout, improved analog sticks, and rumble motors within the triggers for directional haptic feedback.
You can connect your Xbox Wireless Controller to a Windows PC using a USB cable. This method works on both Windows 10 and Windows 11.
Table of Contents
Using a USB Cable:
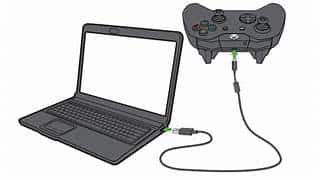
One of the simplest ways to connect an Xbox controller to a PC is by using a USB cable. Just plug one end of the cable into the controller and the other end into an available USB port on your computer.
Once Windows or whichever operating system you’re using recognizes the controller, you can start gaming.
This method is convenient and offers lower input latency compared to Bluetooth connections. If you’re using an older Windows device, it may be necessary to download and install the drivers for your controller manually.
This is a great option for people who aren’t comfortable with setting up and configuring a wireless connection. However, you’ll need a separate Xbox wireless adapter for this method, which can be purchased for around $25.
You’ll also need to make sure that your controller has the latest firmware update. If it doesn’t, you may experience issues with connectivity. You can check the firmware version on your controller through the Settings app.
Using a Bluetooth Adapter:
Using a Bluetooth adapter lets you connect your controller wirelessly. Just plug the adapter into a USB port on your computer, and follow the setup process for it (it’s usually as simple as pressing a button).
Then press and hold the Xbox button on your controller until the light on it starts flashing quickly. Also, push the sync button on your adapter located either on the side or top, depending on the model of the adapter.
Eventually, your controller’s light will stop flashing and turn solid. Windows will then list the controller in its Bluetooth & devices window.
You’ll need a Bluetooth adapter, which you can buy from Amazon. Alternatively, many modern gaming laptops have Bluetooth built in. Just plug the adapter into one of your computer’s USB ports and allow it to install any drivers.
Then, just plug the other end of the cable into your controller. You’re now ready to play. Using this method, you can even connect your Xbox controller to a Windows 10 computer that doesn’t support Bluetooth.
How to Connect Xbox Controller to PC using USB cord Adapter:
Microsoft’s Xbox Wireless Adapter for Windows is a USB-based accessory that lets you connect an Xbox controller to your PC without using Bluetooth.
Plug the adapter into a USB port on your PC and follow the setup process. The LEDs on the adapter and controller should stay lit while they’re connecting.
You’ll need a Windows computer with the Anniversary Update or later and an Xbox One controller. The Xbox accessories app is available through the Store and can let you customize your controller by remapping buttons and changing thumbsticks.
If you’re using a Series X|S controller, press the Guide button to turn it on and hold Pair for three seconds. Then, press the sync button on the adapter (it’s located on the top or side depending on your model).
After a few seconds, the Xbox logo on the controller should start flashing, and your controller should be listed in the Bluetooth & devices window. The Bluetooth icon on the system tray should also show that your controller is connected.
How to Connect Xbox Controller to PC using USB cord Using a Wireless Dongle:
The Xbox Wireless Controller is a popular game console accessory that can also be used on Windows computers.
It has a low input latency, and it can be connected to a computer via Bluetooth or a wired connection. However, it can be difficult to connect if the drivers are outdated.
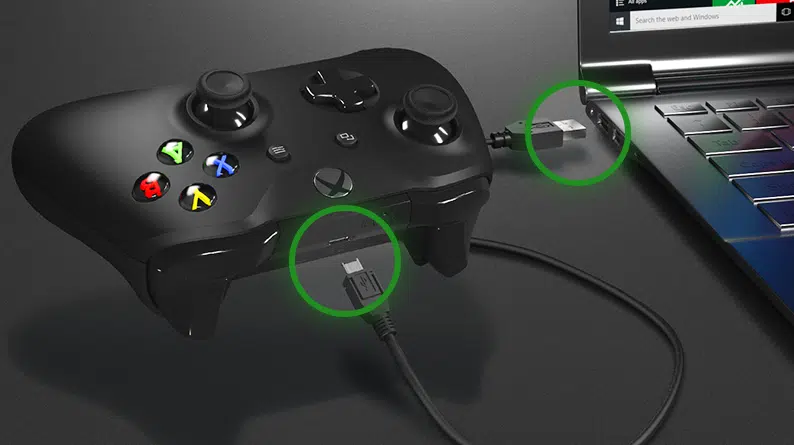
The most straightforward way to connect an Xbox controller to a PC is through a USB cable. Just plug the cable into the socket on the controller and the other end into an available USB port.
On newer versions of Windows, the controller will automatically be recognized and configured. Older versions of Windows will need to download and install the required drivers.
Next, you will need to put the controller into pairing mode. To do this, press the Guide button (the Xbox logo button) on your controller.
Then, press and hold the sync button on your Xbox Wireless Adapter (it is located either on the top of the adapter or on the side depending on which model you have).
The LEDs on both the controller and the adapter will begin flashing rapidly as they enter pairing mode.


Add comment