
Table of Contents
How to View HDMI on Laptop Windows 11?
How To View HDMI On Laptop Windows 11? Switching to HDMI on your laptop can open up new possibilities for entertainment, presentations, and gaming. It can also improve your visual experience by enabling you to view more on your external screen or TV.
To do this, make sure that your Windows 11 computer’s graphics driver is up to date. Outdated drivers can cause compatibility issues with HDMI outputs.
Check Your HDMI Cable:
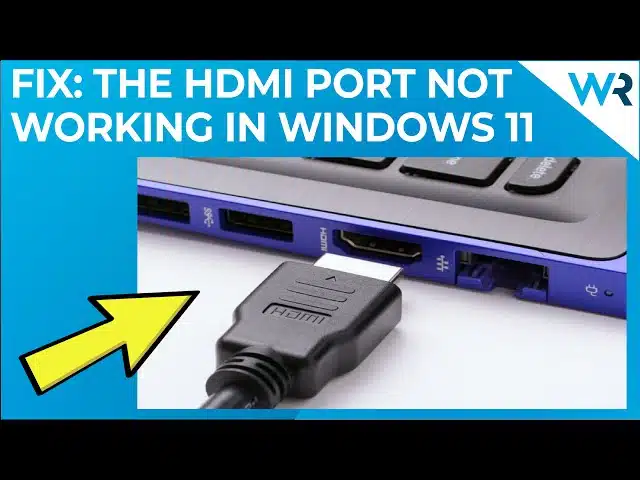
Often, HDMI issues occur due to a faulty cable. You can check this by connecting another HDMI cable to your monitor and laptop. If the connection works, then the problem is with the current cable.
Another common issue that can occur is a software problem. Sometimes, newly installed programs can cause problems with other functions of your Windows 11 operating system. Uninstalling the program could fix this issue.
You can also try restarting your machine to see if that helps. Restarting your computer will refresh the operating system, close all background processes, and clear up any temporary glitches that may have caused the HDMI connection to not work on your laptop.
Finally, you can try updating your graphics drivers to the latest version. Depending on the manufacturer, some PCs and laptops have dedicated OEM programs for their graphics cards. This program can be used to update the driver to a previous version that worked.
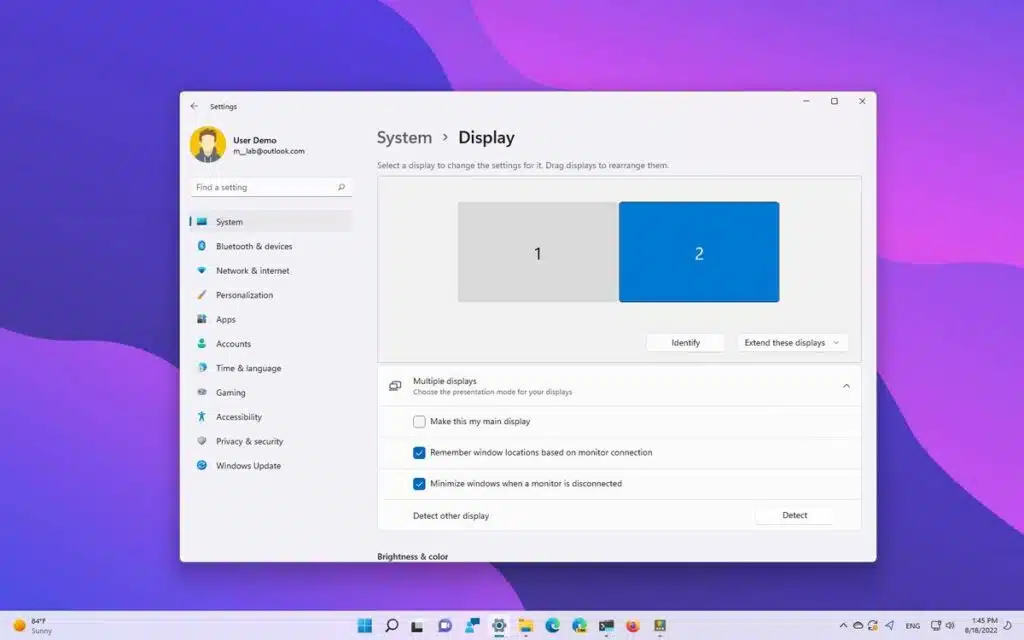
To do this, go to the Settings app and click on System. Then, go to the Display option and look at the scale & layout options. From here, you can change the resolution to a higher one or disable the secondary screen so that everything goes to your primary monitor instead. This will often fix this problem. If not, then you can move on to some more advanced troubleshooting steps.
Check Your Hardware:
If you’re using a laptop with an HDMI port and are unable to see any content on the external screen, it may be because of faulty hardware. Fortunately, there are some troubleshooting steps you can try to resolve the problem.
The first step is to check your cable for any signs of damage or wear and tear. It is also important to make sure that the HDMI connectors on both ends of the cable are free from dust or debris. Depending on the condition of the cables, you might need to replace them.
Another possible cause of this issue is a malfunctioning graphics driver. You can update the drivers for your graphics hardware to improve performance and compatibility with HDMI output. To do this, go to the manufacturer’s website and download the latest drivers for your PC.
Once you’ve updated the drivers, restart your computer and test the connection to an external display or TV.
If you’re unable to fix the problem, contact your laptop manufacturer or authorized service center. If your laptop is under warranty, you may be able to get it fixed for free. Otherwise, you’ll need to pay for the repairs or replacements. You may also be able to find the solution in the documentation that came with your computer or in online forums.
Check the Connection:
When connecting your laptop to an external display or TV, it is important to check the connection. You may have a damaged HDMI cable or the hardware may be faulty. It is also possible that your PC’s HDMI drivers are outdated. This can lead to compatibility issues or display settings problems. In this case, you can try updating the driver to fix the problem.
Another option is to reboot your computer. This will refresh the operating system and clear any temporary glitches that could be causing the HDMI connection to not work properly. It will also update any missing drivers affecting your HDMI experience.
Once you have restarted your computer, you can access your video and monitor settings to make sure everything is configured correctly. You can change a variety of different HDMI screen settings here, including the number of monitors, color profiles, and display adapter properties. You can also change the resolution of your monitor or TV. You can even use your laptop to screen share with a television by using the Miracast feature.
It is also a good idea to uninstall any newly installed software that you have recently added. Sometimes, new programs can cause HDMI to not work properly on a Windows 11 laptop. To uninstall a program, you can select it from the list and click on the Uninstall program button.
Check the Settings:
Sometimes, an issue with your HDMI port can be fixed by simply changing the settings on your laptop. This is a simple step that may not only fix the problem, but will also help you get back to your normal work routine sooner. To check the display settings, simply press the Windows key and P together. Then, choose either PC screen only, Duplicate, or Extend to get your laptop back up and running.
Another common troubleshooting method is to restart your computer. While this may seem basic, it can be a great way to clear out any corrupt files and refresh your system. This is especially true if your problem is due to an error with the system software.
You should also make sure that your display drivers are up-to-date. Outdated drivers can cause all kinds of problems, including an inability to detect your monitor over HDMI. You can check for updated drivers by running the Driver Easy program or by using the built-in Device Manager tool on your Windows machine.
Once you have the latest drivers installed, you can change other HDMI screen settings on your Windows 11 laptop. You can do this by pressing the Windows key and opening the Settings app. Once in the app, click System on the left and then Display on the right. From here, you can set the HDMI screen to be your default display or change other settings like the Scale & layout options.


Add comment