
If you are a fan of Samsung Galaxy Buds, then you might be looking for a way to connect them to your laptop. Well, you’re in luck!
These earbuds support Microsoft’s Swift Pair feature, which means that when you open the case next to your PC, it will prompt you to pair them.
Table of Contents
1. Turn on the buds:
If you are using a PC running on Windows 10, you can easily connect your Samsung Galaxy Buds to it via the Bluetooth feature.
You just need to make sure that your Samsung buds support this feature and have Swift Pair enabled.
Thankfully, this process is extremely easy and fast. You just need to open up the case, and your earbuds will automatically enter pairing mode.
Once they are in pairing mode, they will be detected by the PC and will pop up in the list of connected devices. This will enable you to use them with your PC for voice and music.
If you are facing problems with your Samsung buds not showing up on your laptop, restarting the system might fix the problem. Rebooting your computer will refresh all the processes and connected devices.
2. Open the case:
One of the perks of owning wireless headphones like Galaxy Buds is that they’re easy to pair with your PC. Traditionally, pairing a pair of Bluetooth earbuds has required multiple steps that could take you as long as 6 clicks at the very least.
But thanks to a little-used feature in Windows 10, it’s possible to connect your Samsung Galaxy Buds in the blink of an eye, and even get the audio to play without any fiddling around at all.
First, you’ll need to open the case that holds your buds. You can do this by placing the device in its charging slot and squeezing it gently to unlock the door, or by pressing the top-right button on the cover.
In either case, the process should take just a few seconds. If you don’t have an Android device, you can also use the Samsung Gear app to get your Bluetooth earbuds to talk to your PC.
3. Turn on the PC:
If you have a PC, you can pair Samsung Galaxy buds with it easily. The process is simple and requires only a few steps.
Firstly, turn on your Windows laptop or desktop computer. After you start it, go to the settings menu and access the Bluetooth & other devices option.

Next, enable the pairing mode on your PC and click on the plus sign to add the earbuds. This enables your laptop to detect them automatically and connect them.
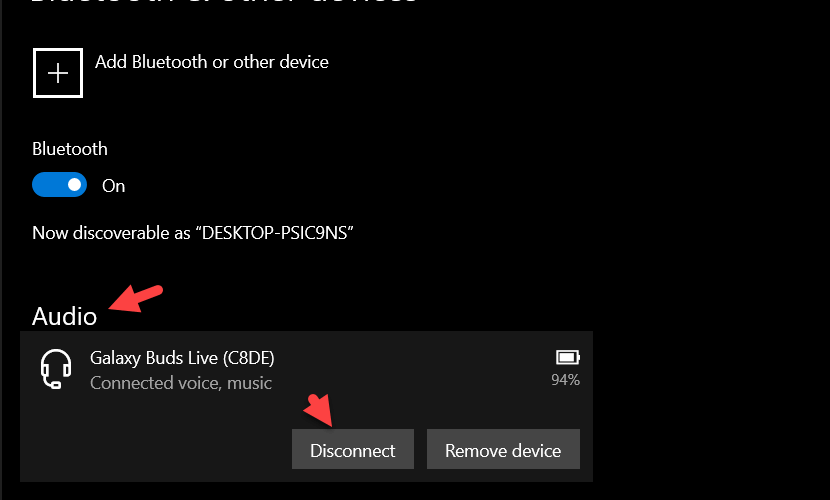
This step may take a few seconds as it tries to find your earbuds and connect them. Once done, it should display the name of your earbuds on the screen as shown in the picture below.
If you have any problems connecting your buds to Windows 10, you can try running a troubleshooter on Windows 10. This tool can help you identify and fix some basic issues.
4. Pair the buds:
Once you have opened the case, it’s time to pair the buds with Windows 10. This process is easy on any PC.
For the Samsung Galaxy Buds, you will need to open System Preferences and go to Bluetooth. Once there, you will need to long press on both earbud touchpads and wait for a chime to indicate that they are in pairing mode.
After a few seconds, your computer should list the Buds as an available device. Then, you can click Connect and the computer will take care of the rest.
Using Samsung Galaxy Buds with your Windows 10 PC will give you access to many great features such as Find My Earbuds, battery status, and the ability to use ANC with compatible earbuds. All of these are just a few reasons why you should give it a try.


Add comment