
Table of Contents
How to Connect DVR to the Internet:
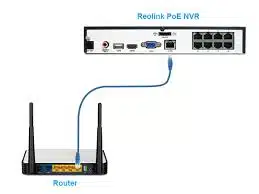
Before you can connect your DVR to the internet, you need to configure it properly. You should use an ethernet cable to connect the DVR to your active internet connection.
You can also configure port forwarding. In addition, you need to set up a static IP address. After that, you can start connecting your DVR to the internet.
Port forwarding how to Connect DVR to the Internet:
If you’d like to connect to your DVR from a different location, you need to enable port forwarding.
Without port forwarding, your router won’t know which device to connect to. Fortunately, you can assign a “map” to specific ports on your router.
Before configuring port forwarding on your router, you need to determine the port numbers that your DVR is using.
For example, if your DVR uses port 80 for HTTP traffic, you’ll have to allow this port in order to connect to it. You can also allow port 37778, which is a TCP-type video streaming port.
In order to enable port forwarding on your router, you must use an operating system that supports port forwarding.
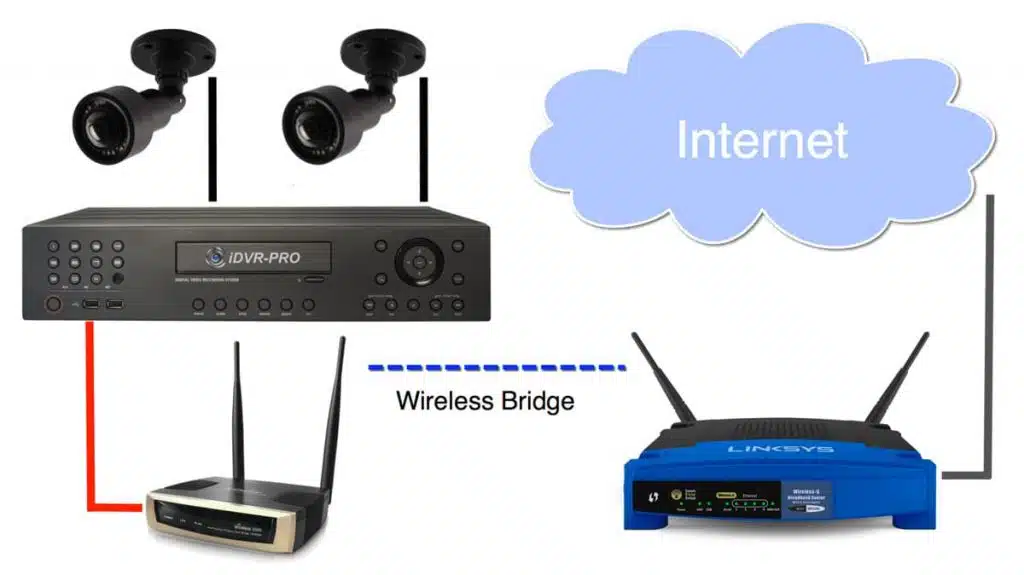
The IP address of your DVR should be the same as the IP address of your router. You can then access the DVR remotely. To do this, you’ll need a personal computer that’s connected to the same router as your NVR.
Configuring DHCP mode:
Before connecting your DVR to the Internet, make sure that you are using DHCP mode. This mode ensures that your DVR will always have the same IP address.
Otherwise, you could lose remote access if your router loses power. You should be able to see this mode in the TCP/IP setup screen.
You can also check the MAC address of the device in the DHCP status or connected devices list to verify whether it has a valid MAC address.
Some DVR/NVR models may allow you to change this address. In most cases, the DVR/NVR will display the MAC address that it was assigned at the factory.
However, you should be aware that the IP address that you are assigned by DHCP is only valid for a specified period. This period is called the lease. Once this lease expires, the client cannot use the IP address.
When this happens, you should terminate communication with the IP network and request a new lease cycle. This cycle usually starts halfway through the lease period. This process ensures that IP addresses are allocated to devices reliably.
Troubleshooting network issues:
If you’re experiencing network issues while connecting your DVR to the Internet, there are several solutions to try. The first step is to check your DVR’s network settings.
Check whether it’s set to Dynamic Host Configuration Protocol (DHCP) or static IP. If it’s set to static, your DVR may have trouble connecting to the Internet.
Power cycling your DVR and router may help. Power cycling will temporarily disrupt network communication and allow the system to reconnect.
Also, be sure that the DVR/NVR has the correct port forwarding settings. If it’s not, check the settings on your router.
If your network settings are causing network connectivity problems, you can try to connect to the DVR from outside your network by adding:88 to the public IP address.
You should see an ActiveX web service prompt when you do this. If you don’t see this prompt, then you might have a problem with port forwarding.


Add comment