

Table of Contents
How to Connect MacBook to Printer Wirelessly?
How To Connect MacBook To Printer Wirelessly? You can connect your MacBook Air to a printer wirelessly using either Wi-Fi or Bluetooth. Just make sure that both devices are on the same network and that the printer has a working internet connection.
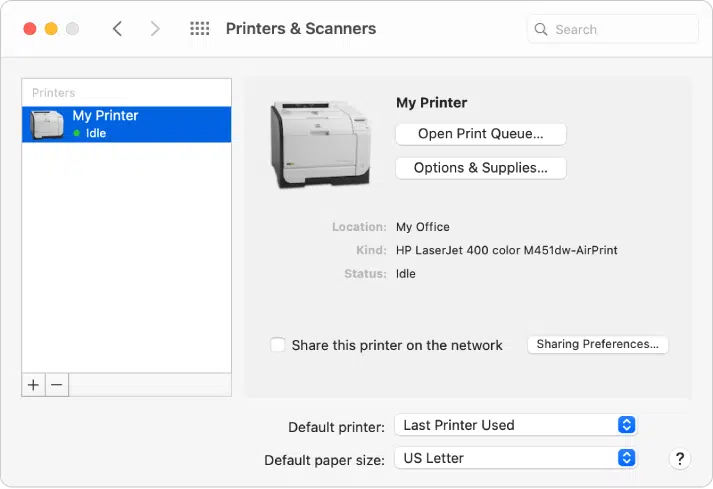
To add a printer to your Mac, go to System Preferences and click on “Printers & Scanners”. Follow the instructions on the screen.
Wi-Fi:
Printing wirelessly is a convenient way to reduce the amount of paper you use and eliminate the need for wires. It is also very easy to set up and use. This guide will show you how to connect your MacBook to a printer wirelessly using Wi-Fi or Bluetooth. Once you’ve done this, you can print from anywhere in the world without worrying about the location of your printer or whether it is turned on.
To start, you will need to make sure that both your printer and your MacBook are connected to the same Wi-Fi network. Next, open the Printers & Scanners menu on your Mac and click the + sign. In the new window, select the option that says “Add a network, wireless, or USB printer.” Select the name of your printer and click Add. Your Mac will then automatically search for the printer on your network. If it finds it, it will display the name of the printer in the list and will also install any necessary drivers for your device.
If your printer is not listed, you can manually enter its IP address in the list. This is a good option for older printers that don’t support AirPrint or if your Mac doesn’t find the right drivers automatically. Simply type the printer’s IP address into the box, choose a protocol, and fill in a name. Once you’re done, click Add. Your Mac will now set up the printer by installing the appropriate drivers.
Adding a printer to your MacBook Pro is a straightforward process, but you may run into some issues. If you run into problems, try restarting both the printer and your MacBook Pro, ensuring that they’re on the same network, and checking for software updates. If these steps don’t work, you can always call the helpline for your printer manufacturer to troubleshoot the problem.
Bluetooth:
You can connect a MacBook Pro to a printer wirelessly using Bluetooth, which makes printing easier and faster. To set up your Bluetooth printer, follow the manufacturer’s instructions. Once you have a working connection, you can use the Apple menu to add the printer in System Preferences. You may need to restart your printer and your Wi-Fi router to get the connections to work. Then, you can print a test page to make sure that your MacBook and the printer are connected.
You can also use a USB cable to connect your laptop to a printer, which will allow you to print documents without having to turn on your Wi-Fi or Ethernet connection. This method works best if your printer is located close to your laptop. You can also use a Bluetooth adapter to connect your laptop to a printer that doesn’t support Bluetooth.
Whether you’re connecting a USB, network, or Bluetooth printer, the process is relatively similar. Plug the printer’s USB cable into your Mac, then run System Preferences and click on “Printers & Scanners.” If you see your printer listed, select it and follow any on-screen instructions to install drivers. If you don’t see your printer, try restarting the device and re-installing any driver software that comes with it.
Depending on the model of your printer, you might need to download additional drivers from the manufacturer’s website. In addition to this, some printers require that you enable AirPrint or manually add them to your list of available printers. If you’re having trouble adding your printer, try contacting the manufacturer or visiting the App Store to find additional drivers. If you’re still having problems, try a tool like MacKeeper, which will optimize your Mac and ensure that it’s running at peak performance.
USB:
Printers are a necessary device for many businesses and homes. However, the ability to store documents in the cloud and access them from anywhere has reduced the need for printing. Even so, there are still occasions when a document needs to be printed. Fortunately, Mac computers make it easy to connect printers using WiFi or USB. Whether you’re connecting a wired or wireless printer, the process is the same. To start, make sure the printer is turned on and connected to a working power source. Also, check that the printer and Mac are on the same Wi-Fi network. If not, you can try restarting the router and installing fresh firmware. If this doesn’t work, you can also reset the printer system by going to the Apple menu System Preferences Printers & Scanners.
Once you’ve checked that your printer is connected to a working power source and Wi-Fi, you can begin the process of adding it to your Mac. To do this, click on the Apple icon in the top left corner of the screen and select System Preferences. Next, click on Printers & Scanners and then click the + sign to add a printer. Once you’ve done this, your computer should automatically detect the printer and download any required software. If this doesn’t happen, you can manually add the printer by entering its IP address.
You can get your printer’s IP address by following the instructions in the printer’s user manual. Once you’ve figured out the IP address, type it into the “Address” field of the Printers & Scanners window. Then, select a printer driver in the “Use” field and click Add. Once you’ve added the printer, it will appear in the list of available printers on your Mac. If you have a multi-port USB hub, you can use it to add multiple printers to your MacBook.


Add comment