
Table of Contents
How to Connect One Printer to Two Computers With Cable?
How To Connect One Printer To Two Computers With Cable? There are a few different ways to connect one printer to two computers with cable. One way is to use a peripheral switch.
Another way is to use a USB cable.
If you choose the latter option, make sure that you change the mode on the switch (or the transfer program if your cable has both modes) without the cable attached to the computer.
1. Connect the Printer to the Computer:
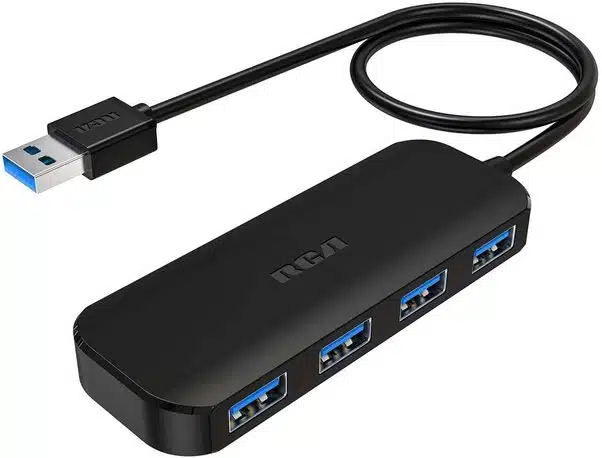
First, make sure the printer is turned on and connected to the power supply. Next, connect the USB cable to the printer and to your computer. On Windows computers, the best way to do this is by using a USB hub or adapter. These devices allow you to plug multiple USB cables into a single hub or adapter, making it easier for you to connect more than one printer to your computer.
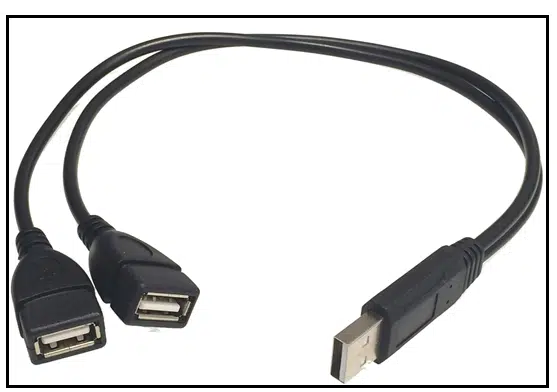
You can also connect the printer to your computer using a standard USB cable, provided that both computers use the same operating system. You can purchase these cables at most electronics stores and online retailers. If you are connecting two different types of computers, you should use a crossover cable rather than a regular USB cable.
Once you have connected the printer to your computer, you can share it with another computer on your network. To do this, you must set up a homegroup in Windows or a workgroup in Mac OS X. To do this, open Control Panel and click Network and Internet. Then, click Sharing and select the option to enable printer sharing.
You can also share a printer with other PCs on your wireless network by using a router and an Ethernet cable. This method is preferred for organizations that want to ensure that all employees can print from any location.
2. Connect the Printer to the Network:
Many printers can connect to your network using Wi-Fi, but some require a wired connection. Look for a wired network port on the back of the printer, then connect one end of a Cat 5 network cable to that port and the other end of the cable to an available wired network port on your router. Turn on the printer and wait several minutes for it to cycle through its start-up process and connect to your network.
On the computer that you want to share the printer, open System Preferences and select Printers & Scanners. Click + below the printer list in the left panel to add the shared printer. In Windows, open the Control Panel and click Devices and Printers. Click Add a printer or scanner, then select the shared printer from the list.
Make sure that the Mac with which you want to share the printer is connected to your wireless network and has the printer drivers installed. You may need to change the mode in which you are using your USB cable, depending on the manufacturer.
Some cables ship with two different modes (link mode and network mode). If you changed the mode while the cable was attached to a computer, remove the cable and then install it again to force Windows to install the correct drivers.
3. Connect the Printer to the Peripheral Switch:
There are a few different ways to connect a printer to a peripheral switch, but the easiest way is to use an ethernet cable. To do this, plug one end of the cable into the printer and the other end into an available port on the switch. Then, connect the switch to a power source and turn on the switch.
You can also connect the printer to a KVMP switch using a USB cable. To do this, plug one end of the USB cable into the printer and the other end into a USB port on the switch. Then, connect an ethernet cable from the switch to the network and connect another ethernet cable from the switch to the computer.
Once you’ve connected the switch to the computer and printer, you can print from either computer. However, if you want to print from both computers at the same time, you’ll need to add the printer as a network printer on both computers.
To do this, open the Control Panel and select “Devices and Printers”. Then, click on the printer and select “Add a network, wireless or Bluetooth printer”. Next, select the option to share the printer with other devices on the network. Finally, select the name of the computer on which you want to install the driver. Then follow the prompts to install the drivers on the second computer.
4. Connect the Printer to the Second Computer:
The simplest way to connect two computer systems without using the internet is by using an ethernet cable. Make sure the printer is powered on and plugged in, then plug one end of the cable into a free port on the first system. The other end should go into the appropriate port on the second system. Once the connection is complete, the printer will appear in the list of available devices in the Control Panel on either system.
Another method for connecting computers is by using a USB cable. If the printer doesn’t have a wireless option, turn off its Wi-Fi and connect it to your laptop via a USB cable. Make sure that the printer has the proper drivers installed, which are usually available from the manufacturer’s website. After the driver is installed, hook up the square end of the cable to the printer and the flat end to a free USB port on the laptop.
If the laptop is running a version of Windows that supports HomeGroup, this can be a quick and easy way to share the printer. To do this, simply open the printer’s Properties page and select the Sharing tab. From here, you can select which folders and users will have access to the printer. You can also set a password for the printer.


Add comment