
Table of Contents
How To Connect Pex Pipe Through Studs And Joists?
How To Connect Pex Pipe? When running PEX pipe through studs and joists. Use support clips every 3 ft. and add abrasion protection plates where needed.
Crimp connections require a special tool and crimp rings, which can be costly. But they allow you to check a completed connection with a go/no-go gauge.
Features Of Connect Pex Pipe
With PEX pipe now largely replacing copper for water lines in new homes. You’re likely to encounter this versatile plumbing material on your next home improvement project. But like all pipes, it must be properly connected to other pieces to prevent leaks and water loss. That’s why it’s important to understand the five different ways you can connect PEX. Watch this installment of Tool Tech to learn the pros and cons of each method. So you can select the one that’s right for your work.
Crimp connections
The most common way to join PEX is with copper crimp rings (view on Amazon). A copper ring slips over the end of a length of tubing. A Pex crimping tool (view on Amazon) squeezes around the ring and tube to form a secure seal. This is the method most plumbers use, and it works well in open spaces.
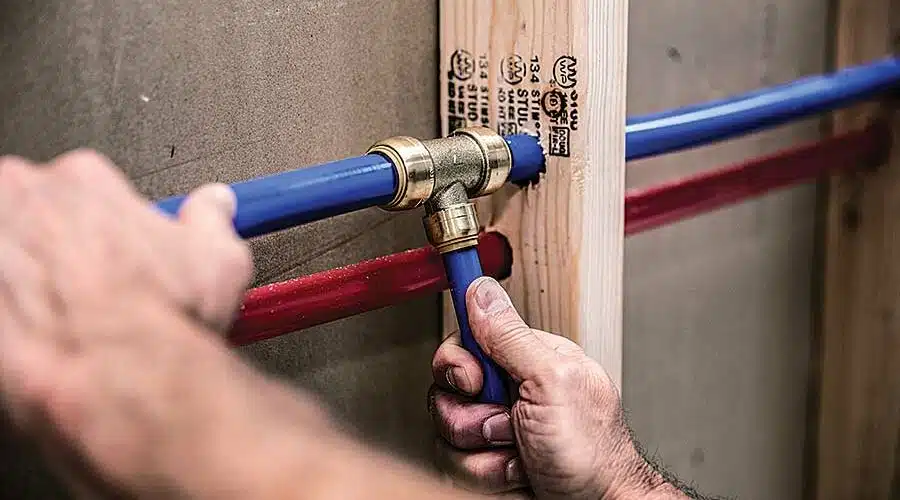
Push-fit connections
The fastest and easiest way to make a connection in PEX is with push-fit fittings that have stiffening sleeves that grab the end of tubing when you insert it into them. These are similar to the paper tubes that grabbed your fingers as a kid, and they’re easy to install and remove. However, the sleeve can degrade in sunlight, so keep it out of direct sun and store it indoors.
Crimp Method
There are a few different methods for connecting PEX pipes. There are push-fit connectors such as Sharkbite that just snap on. The crimping method uses copper crimp rings and a special-sized crimp tool to secure the connection. The crimp ring is an unbroken single piece of metal that slides onto the end of the pipe. And is slightly larger than the tube itself. When the crimp tool is closed it clamps around the ring and crimps it to make a permanent seal.
This is the most common way to connect PEX tubing and requires a bit of practice to get right. Start by cutting the pipe to length using a PEX pipe cutter. Be sure the cut is smooth and square to the end of the pipe. Then slide the crimp ring on and position it about 1/4- 1/8 inch from the end of the pipe. Next, snag the appropriate-sized crimp tool and slide its jaws over the crimp ring evenly. Then firmly force the handles of the tool closed. The crimped ring should now fit snugly over the end of the tubing and can be checked with a PEX crimp gauge to ensure it has been properly crimped.
Cinch Ring Method
Unlike the crimp method, cinch connections don’t require a special tool to complete. They involve a clamping tool, the correct PEX fittings, and a pinch-ring made from copper. Cinch rings are more compact and easier to work with in tight spaces, and they can be used on multiple PEX sizes. They are also less expensive than crimp rings and last for years.
When using this connection method, always fit the adapter (which can be threaded on galvanized pipe or soldered to copper) to the existing pipe first before connecting the PEX tubing. This ensures that the transition is properly secured to prevent leaks. Then, slide the ring over the end of the tubing and insert the fitting. Push down on the cinch tool’s jaws and squeeze it until it firmly cinches the ring around the fitting and the pipe. Always check a completed cinch connection with a PEX go/no-go gauge.
Remember to heat pipes and fittings before working on them, particularly in cold weather. Doing so prevents the pipe from contracting, which can cause a weak point at the joint. Some contractors prefer to use a heat gun or hair dryer, while others leave the pipes in a warm vehicle for a little while or put them in a thermos of hot water. Whatever you do, keep in mind that PEX expands and contracts more than copper, so don’t stretch it tightly. Instead, leave a bit of slack on long runs to allow for expansion and contraction.
Push-Fit Method
The simplest way to connect PEX is with special push-fit fittings that pop onto the end of the pipe. No tools are needed, and no crimping or clamping is involved. It’s also the quickest method. Just be sure you have the right fitting for the job, as these are available only through plumbing supply companies and aren’t sold in big-box stores (see the Fine Homebuilding article on this connection type).
A special PEX adapter is needed to convert threaded galvanized or copper pipes to push-fit connections, and it must be used properly to prevent leaks. For example, the ring on the adapter must be deburred to prevent damage during insertion and the pipe surface under the ring should be smooth to ensure an adequate seal. In addition, you must carefully place the ring over the ribs in the adapter to compress them.
Then, insert the PEX tubing and fit a ring on the tubing over the adapter’s ring. This ring should be positioned so it’s flush with the ribs in the adapter and tightened with a stainless steel clamp-ring crimper to compress them and make the connection watertight. As with all PEX connections, it’s important to work with the pipes at temperatures above freezing and use a good quality crimping tool or clamp-ring crimper. Always check completed connections using a PEX go/no-go gauge to ensure they are watertight.
Expansion Method
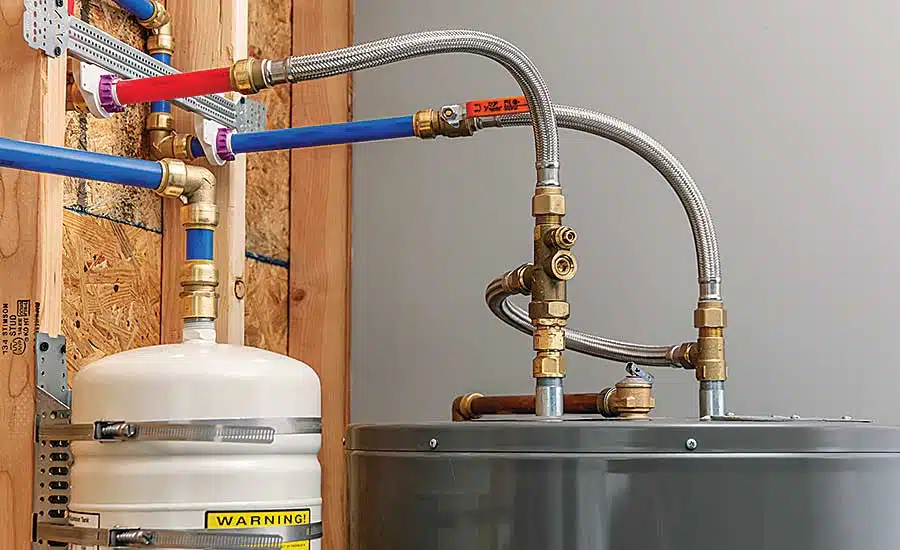
PEX expands and contracts with temperature changes, so it’s good to protect it from abrasion by wrapping it with inexpensive pipe insulation or installing abrasion clips. It’s especially important to support PEX runs that bend, like those leading from a valve to a sink or toilet, so they don’t kink or become loose and create a water leak. Runs of PEX that are encased in concrete or passing through joists, ductwork, block walls, and steel studs need to be supported at least every 3 ft with abrasion clips or bend supports.
Another way to protect PEX is to use a bung or other fitting for a shutoff valve or install a PEX adapter that can accept a standard copper shutoff valve (shown here). These are available at most home improvement stores and plumber supply houses.
A final connection method is called the expansion method, which uses a tool to expand the end of a PEX tube over a brass fitting. This allows the fitting to be inserted without needing a crimp or cinch connection, and the expanded tube will hold the fitting in place as it shrinks back down.
When connecting PEX to existing plumbing, shut off the water, drain both pipes, and bleed the system before you begin. Always buy transition fittings made by the same manufacturer as your PEX pipe to ensure a compatible match. If you are converting from copper, CPVC, or steel to PEX, be sure to solder. Or glue the transition fittings before you crimp your PEX line on them.
Conclusion
Whether you’re a homeowner making a DIY plumbing repair or a plumber working with PEX on a new project. Choosing the right components is essential to setting yourself up for success. While these nuances may seem minor to the uninitiated. Mismatched, or incorrect PEX plumbing components can lead to major problems down the road. Luckily, with the right knowledge and tools. Working with PEX is easy and can save you time and money on your next plumbing project. This article will give you a quick look at the different types of PEX pipes and their respective connectors, allowing you to choose the best option for your specific job site needs.


Add comment