

Table of Contents
How to Connect the Computer to the Printer Wirelessly:
If you’re using a Mac, you’ll need to know how to connect the computer to the printer wirelessly. Macs don’t have traditional USB ports, so you’ll need a USB-C-to-USB adapter.
Once you have the adapter, you can plug in the printer. If your printer uses Bluetooth, you’ll have to set up the Bluetooth connection first.
How to add a How to connect the computer to Printer wireless Mac:
When you want to connect the computer to the printer wirelessly, there are several steps to follow. First, you must add the printer to your Mac.
You can either choose Print & Scan under Hardware or click the Add Printer icon. Once you have chosen the type of printer, you must install the necessary software and drivers.
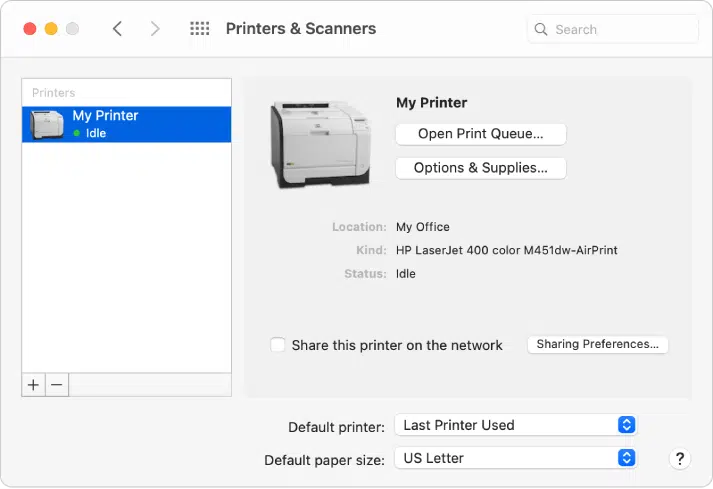
The next step is to add the printer to your network. You can do this from the Printers & Scanners menu in the System Preferences app. Click the Plus icon to open the Add Printer dialog box. You’ll be prompted to enter the IP address and Admin User Name.
If the printer has a password, enter it in the Admin User Name and password fields. Once you have entered this information, you can move on to adding the printer to your Mac network.
Adding a printer via USB:
Also, If you want to add a printer to your Mac, there are a few steps that you need to take to get it set up. First, you need to make sure that your Mac and printer are on the same network. If you don’t have a network, you can try connecting your printer to your Mac via Bluetooth.
The next step is to install the printer software. It should be easy to install. Depending on the printer, you may need to download a USB-C adapter. After installing the printer, make sure that it is working and that you have downloaded any new software that’s needed.
If your printer is USB-C, you may want to purchase a multi-port adapter for your Mac so that you can plug in non-USB-C devices without worrying about conflicting with your USB-C port. Next, go to the System Preferences app and select the Printers and Scanners option. Click the “+” or “-” icon to add or remove the printer from the list.
Adding a printer via Wi-Fi:
Also, If you have a Mac and need to connect your printer to your Mac, there are a few simple steps you can take to get it working. First, you need to add the printer to your Mac.
If you are using an older Mac, you can do this by going to the Apple menu, then selecting Hardware. Then, under the Kind column, click Add Printer. After you have added the printer, it will appear in the list of available printers on your network.
Alternatively, you can add a printer from the System Preferences menu. In order to do this, you must know the IP address of your printer.
If you don’t have this information, open System Preferences and locate the Printers & Scanners icon. In the Add Printer dialog box, type the IP address into the Address field.
Adding a printer via AirPrint:
Connecting a printer to a Mac is easy. Macs will automatically detect and install printer drivers when connected to the same Wi-Fi network as your Mac.
This process will vary depending on the type of printer you have. If your printer is not AirPrint-enabled, you can connect it via USB or Ethernet cable.
You can use AirPrint to print from your iPad, iPhone, or Mac. The first thing you should do is make sure that your printer is connected to the same WiFi network as your Mac.
You may also need to configure the printer by providing the necessary information. You can find more information on Apple Support.
After the printer has been added, it will appear in your Mac’s printer list. If the printer did not list you may need to install the driver for it. If it does, follow the steps above.
Adding a printer via WPS How to connect the computer to the Printer wireless Mac:
Also, If you want to add a printer to your wireless network, you’ll need to configure your router’s wireless settings first. Then, you’ll need to pair the printer and router using WPS.
You can find the WPS pairing button on your router or printer. If you’re not sure how to proceed, get one-to-one technical support from a Which? tech expert.
First, you need to be in the range of your Wi-Fi network. To get started, hold the WPS button on your router or printer for three to five seconds. You’ll be prompted to enter your WPS PIN.


Add comment