
Table of Contents
How to Connect to a Wireless Display?
Connect To A Wireless Display? Connecting to a wireless display can be useful for many reasons. It can improve productivity, enhance multimedia experience, and help you present from a distance. You can also fine-tune the settings for your specific wireless display adapter and Windows device.
To get started, ensure that your device and the display device are compatible. Then, open the device’s settings menu and find the display or screen mirroring option.
Connecting to a wireless display:
A wireless display is a technology that allows you to connect your computer or other devices to a TV, monitor, or projector over Wi-Fi. It eliminates the need for AV cables or adapters, which can be messy and tangled. It also provides freedom of movement, which can be helpful for a variety of applications, including teaching, presenting, or working on collaborative projects.
Using a wireless display allows you to stream movies, TV shows, video games, and presentations from your laptop or smartphone. It also works with many different types of displays, including high-definition TVs and monitors. It can even be used with a projector for large-screen presentations. It is easy to set up, and you can connect multiple devices at the same time.
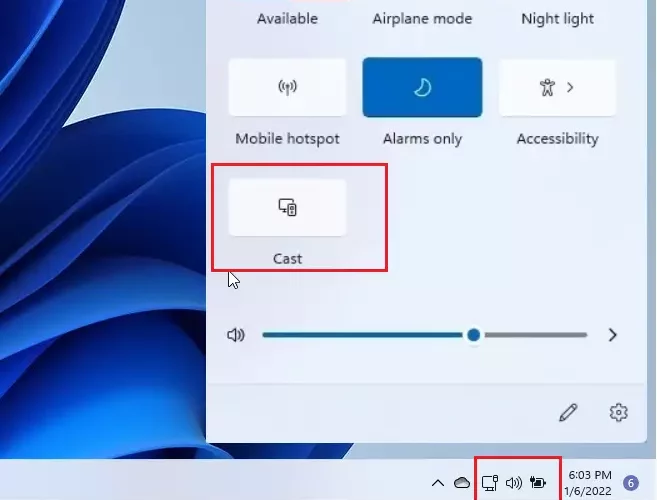
Wireless display technology is built into Windows 10 for laptops, tablets, and hybrids that support it. This feature can be accessed through the Action Center or Settings. It supports several different projection modes, including Duplicate (PC screen only), Extend (PC acts as a second monitor), and Share (screen is shared between two PCs). Once connected to the display, you can select one of these options from the Connect side panel. Depending on your needs, you can also change the connection mode by selecting “More project options” in the menu that appears. You can also disconnect by clicking Disconnect.
Setting up a wireless display:
Whether you need to connect your laptop to an external display or a smart TV, you can use Windows 10’s wireless projection feature to connect without the hassle of cables. This feature allows you to turn your PC into a second screen for increased productivity and collaboration. You can also use it to stream videos and play games. The best part is that this feature works on almost all smart devices and is free.
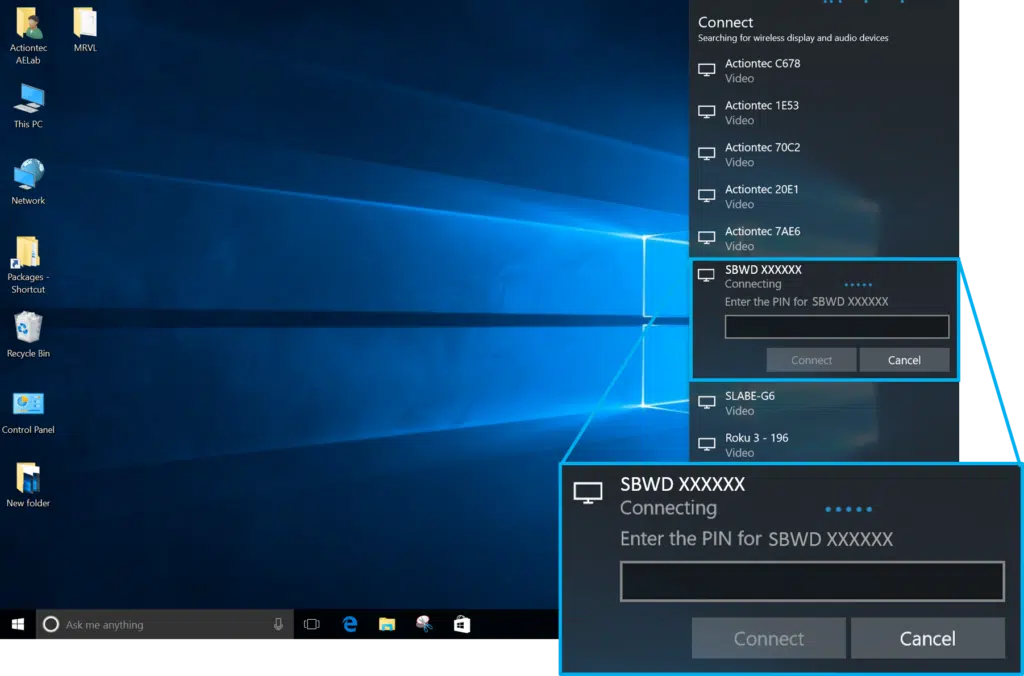
There are several different ways to set up a wireless display, but the basic steps are the same: Connect your device to the same network as the display you want to connect to and open the Connect app. Select the desired projection mode from the menu. For example, “Extend” extends the Windows 10 computer’s monitor to the display, while “Second screen only” turns off your monitor and displays what is on the wireless display instead.
Many wireless display solutions on the market depend on existing IP networks to connect a device to a room display. For example, Apple AirPlay uses Wi-Fi to mirror an iPad or iPhone to a television. Intel WiDi is another popular solution. Both require a compatible adapter and the latest version of your operating system to work properly.
Other wireless projection systems use a peer-to-peer connection between your device and the display. They can be more reliable, and they move heavy video traffic off your wireless network to prevent performance problems.
Using a wireless display:
If you’re using a Windows 10 PC, there are several ways to connect it to a wireless display. For example, you can use the Connect app or the Action Center. You can also configure how you want to project the Windows 10 screen to your wireless display by going to the Settings app and selecting “Projecting to this computer.”
Using a wireless display allows you to wirelessly connect your laptop or tablet with TVs, monitors, or projectors over your home or office network. This can save time and effort because you don’t have to deal with cables or adapters. The technology is compatible with most modern laptops and tablets, and it’s easy to set up.
Troubleshooting a wireless display:
When a wireless display is not working properly, it can be very frustrating. The first step is to make sure that the adapter is working correctly. To do this, open the Action Center and click on the Connect box. If this does not work, try restarting the adapter and trying again.
Using the Wireless Display feature on Windows 10 allows you to mirror or project what is on your computer’s screen to other devices such as TVs, projectors, and other PCs. This is a convenient way to share presentations, videos, and more. However, sometimes the feature stops working and it can be not very clear to fix.
To resolve this problem, you need to update the drivers for your Microsoft Wireless Display Adapter. To do this, you must open the Control Panel and select Device Manager. From the list of available devices, locate Network Adapters and right-click on it. Then, click the Driver tab and select the Update Driver option.
You can also try to remove the firewall settings on your computer. To do this, you must press the Win + R keys on your keyboard and type cmd in the Run dialog box. Then, click Yes in the User Account Control prompt. Once the process is complete, you should be able to use the wireless display feature without any issues.


Add comment