
Most battery boxes or lithium batteries offer a DC outport that can be connected directly to LED strip lights with open wires.
Connecting them is as simple as buying a DC adaptor with open wires or a solderless connector.
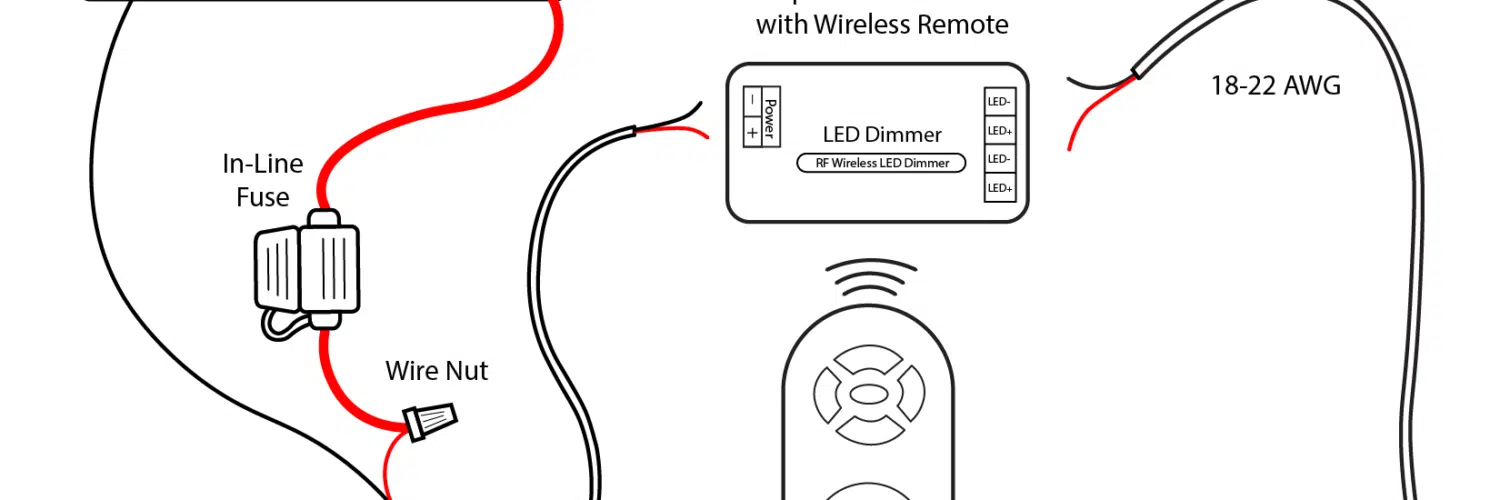
A common LED-to-battery connection involves a dimmer switch to help conserve electricity and extend battery life. Let’s learn more about how this works!
Table of Contents
How to Connect Led to Battery Charging Battery Voltage:
The battery voltage of an LED strip light can have a significant impact on its performance. Generally, the higher the voltage of the battery, the greater its ability to deliver current.
Voltage is a difference in electric potential, and is often compared to the pressure differences of water hoses; a higher voltage results in a faster flow of electrons.
Current, on the other hand, describes how fast a given volume of electrons passes through a circuit and is typically measured in amps.
A battery’s voltage can be determined by looking at its terminals, and identifying the positive and negative ends.
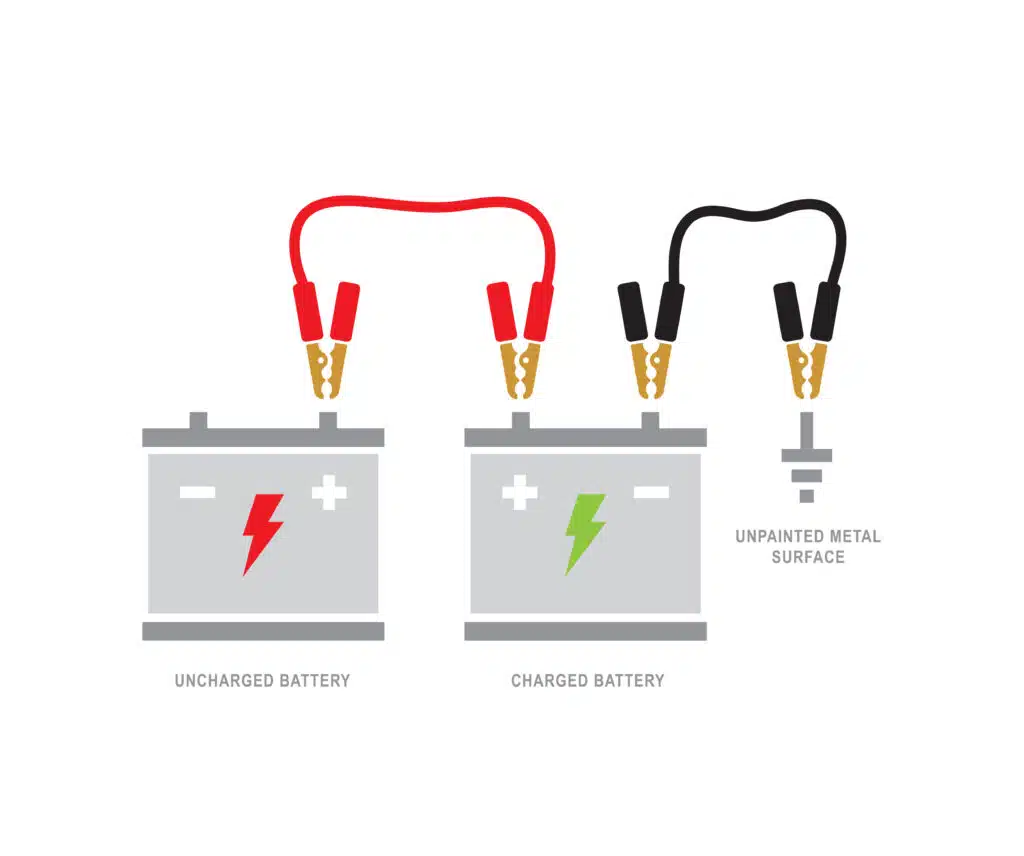
If you’re having trouble with your LED lights, the most common issue is a low battery voltage. This can be easily fixed by connecting the battery to a charger with the included alligator clips. This will restore the lights to full brightness and increase the battery’s life.
If this doesn’t work, check the AC outlet for limited power, which may cause an ERROR condition in the controller.
Battery Capacity How to Connect Led to Battery Charging:
Battery capacity is the amount of electrical energy that can be produced by electrochemical reactions inside a cell.
It’s directly proportional to the amount of electrode material that can actively participate in these redox reactions, providing charge (electrons).
The actual amount of electrical energy that a battery can deliver under specific load conditions is determined by using a multimeter to measure the battery’s voltage and current consumption. The resulting ratio is the battery efficiency factor.
When connecting LED strip lights to the battery, it’s important to know the battery capacity and power consumption of the LED strip.
This can be easily found out by looking at the LED strip’s label. Which will show you the power per meter of the LED strip.
This can be multiplied by the total length of the LED strip to calculate its total power consumption.
The battery capacity is usually listed in milliamp hours, or mAh. The higher the mAh rating, the greater the battery’s capacity.
Resistor Values:
The resistor’s value determines the amount of current that will flow through it. You can calculate the resistance value for an LED circuit by multiplying the voltage of the battery by the forward current of the LED.
You can also use a resistor color code table or calculator to find out the exact value of the resistor you need. Look at the first two color bands on the resistor and find their digit value in the resistor color code chart or calculator.
For example, a 4.7kO resistor has yellow and violet to begin with, which have digit values of 4 and 7 (47). Then go to the next row in the color code chart and look at the number at that point to see its value.
Resistors come in a variety of colors and sizes, including leaded and surface mount devices. You can also purchase a variety of pre-packaged kits with different resistor values to get started in your circuits.
You will need to purchase additional resistors if your calculations require more than what is available in the kit.
Soldering:
Soldering is a process of heating the surfaces to be joined and melting a filler metal, known as solder, into them.
This is then allowed to cool and solidify, creating a strong and reliable connection. The soldering process is much faster and easier than crimping, but it is not without its downsides. Unless performed correctly, soldering can result in poor quality and unreliable connections.
Soldering requires a special iron that is capable of maintaining a high temperature while being used. This is particularly important when soldering to metal, as the metal can easily burn if it gets too hot.
LEDs have a positive side (called the anode) and a negative side (called the cathode). The anode side of the LED is usually longer than the cathode side.
When you connect an LED to a battery, make sure the polarity matches. Otherwise, the LED won’t light up!


Add comment